
Docs navigation
Get started
AI agents
Connect
Operate
Day to day
When it breaks
Govern access
Team & account
Access
Identity concepts
Provider guides
Account
Microsoft Entra
Connect Microsoft Entra to emisar: an app registration signs people in with the oid claim, and a separate enterprise application provisions the directory.
- An Entra administrator.
- An emisar owner or admin.
The sections below build two objects in order — sign-in first, then the directory.
Single sign-on#
Connecting an identity provider is a paid feature. Only available on Team & Enterprise.
-
1
In emisar
Start the connection.
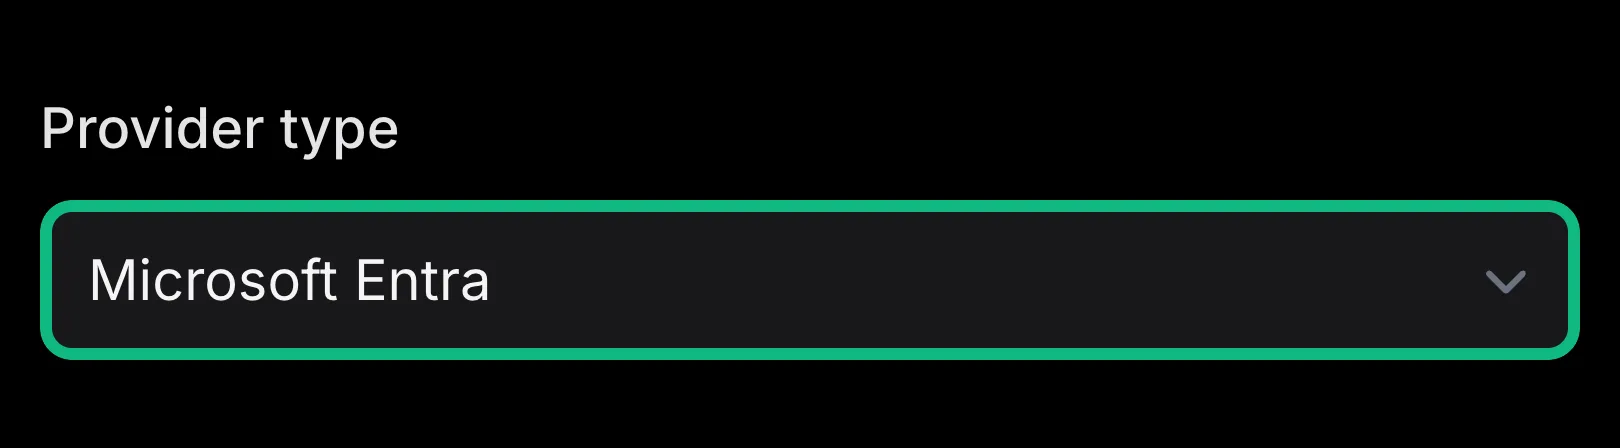
Open Team → Single sign-on → Add connection and choose Microsoft Entra ID. Leave the page open: the callback URL on it is what Entra asks for next, and Entra's values come back here at the end.
emisar · Add connectionPicking the provider here tailors the rest of the form to it. -
2
In Entra
Register the application.
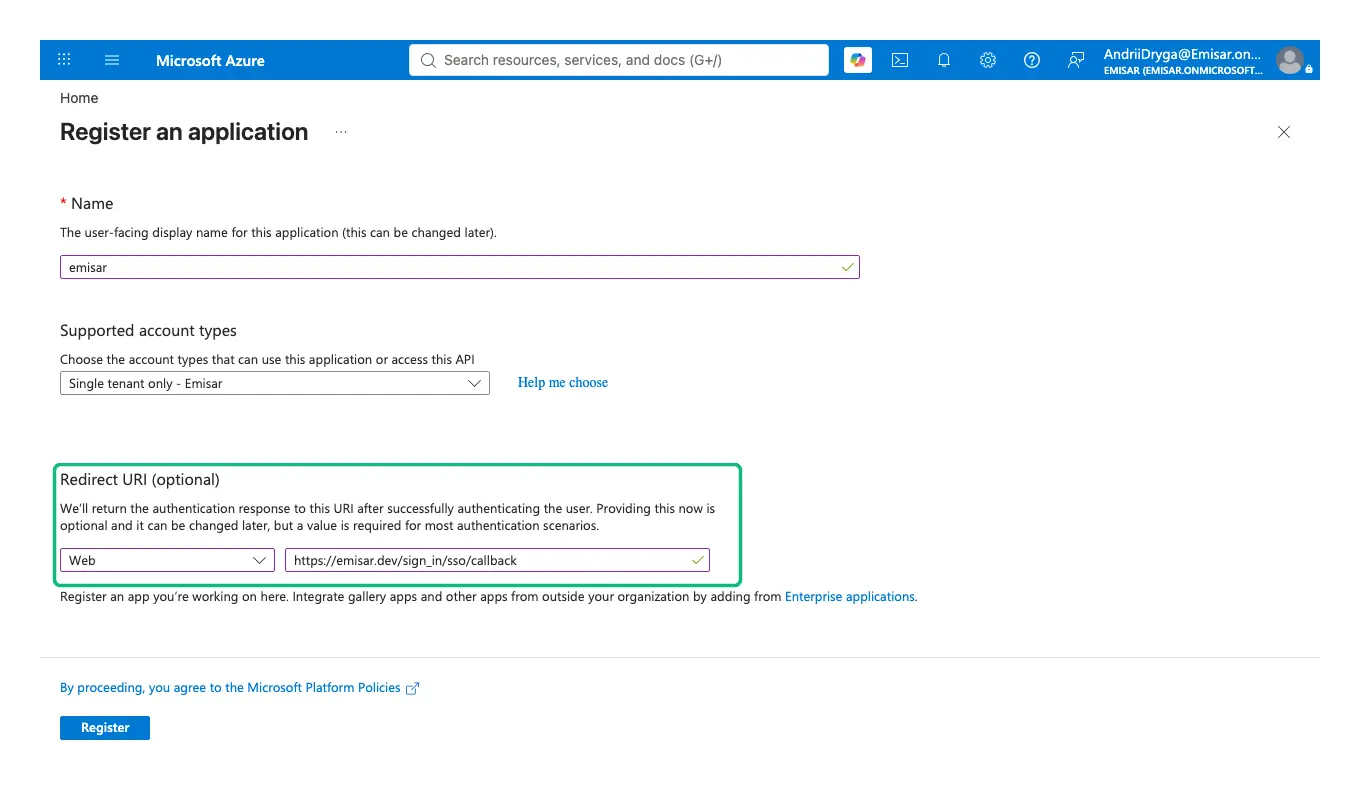
In the Microsoft Entra admin center go to App registrations → New registration. Under Redirect URI choose the Web platform and enter emisar's callback:
Redirect URI
https://emisar.dev/sign_in/sso/callbackMicrosoft Entra admin center · Register an applicationThe platform must be set to Web — the URI beside it is ignored until it is, and the form refuses to register without it. -
3
In Entra
Create a client secret.
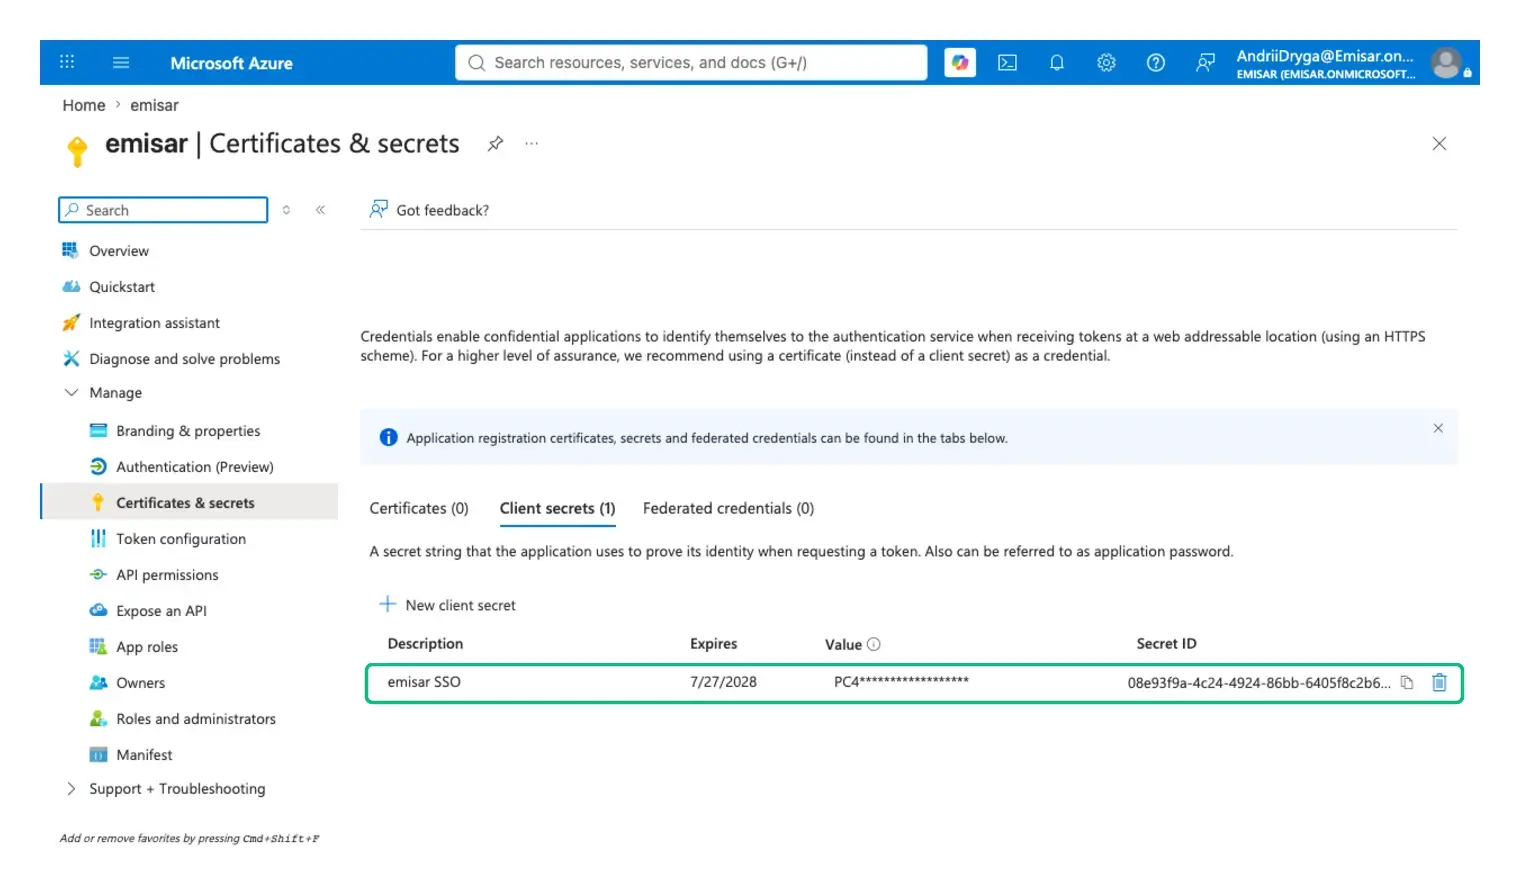
Open Certificates & secrets → New client secret. Copy the Value column, not Secret ID — the value is shown once and is unrecoverable afterwards.
Microsoft Entra · Certificates & secretsPress New client secret, then copy Value while it is shown. Secret ID is not the credential. -
4
In Entra
Copy the client and tenant IDs.
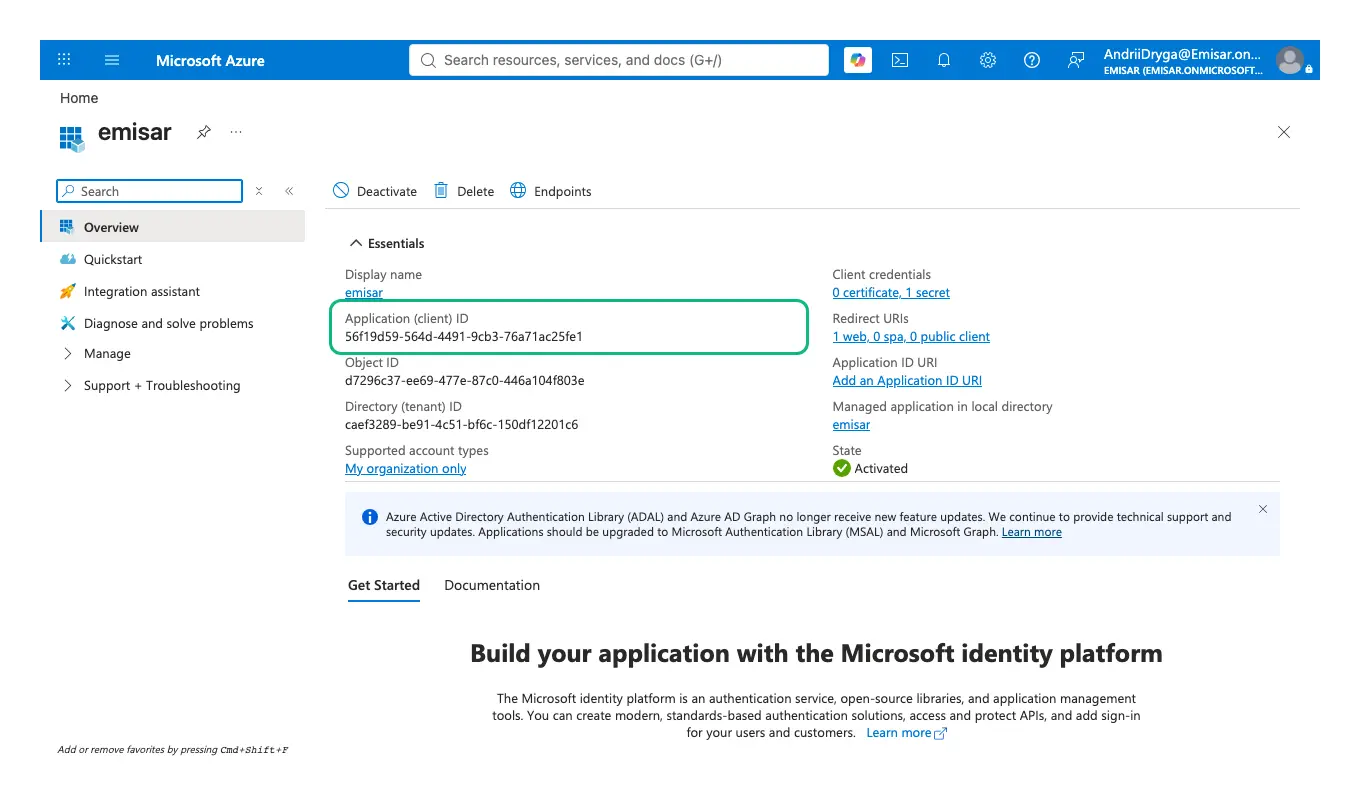
The registration Overview page contains two values. Use Application (client) ID as the client ID. Use Directory (tenant) ID in the issuer URL.
Microsoft Entra · App registration overviewApplication (client) ID is emisar's Client ID. Directory (tenant) ID below it goes into the issuer. -
5
In emisar
Paste them into the connection.
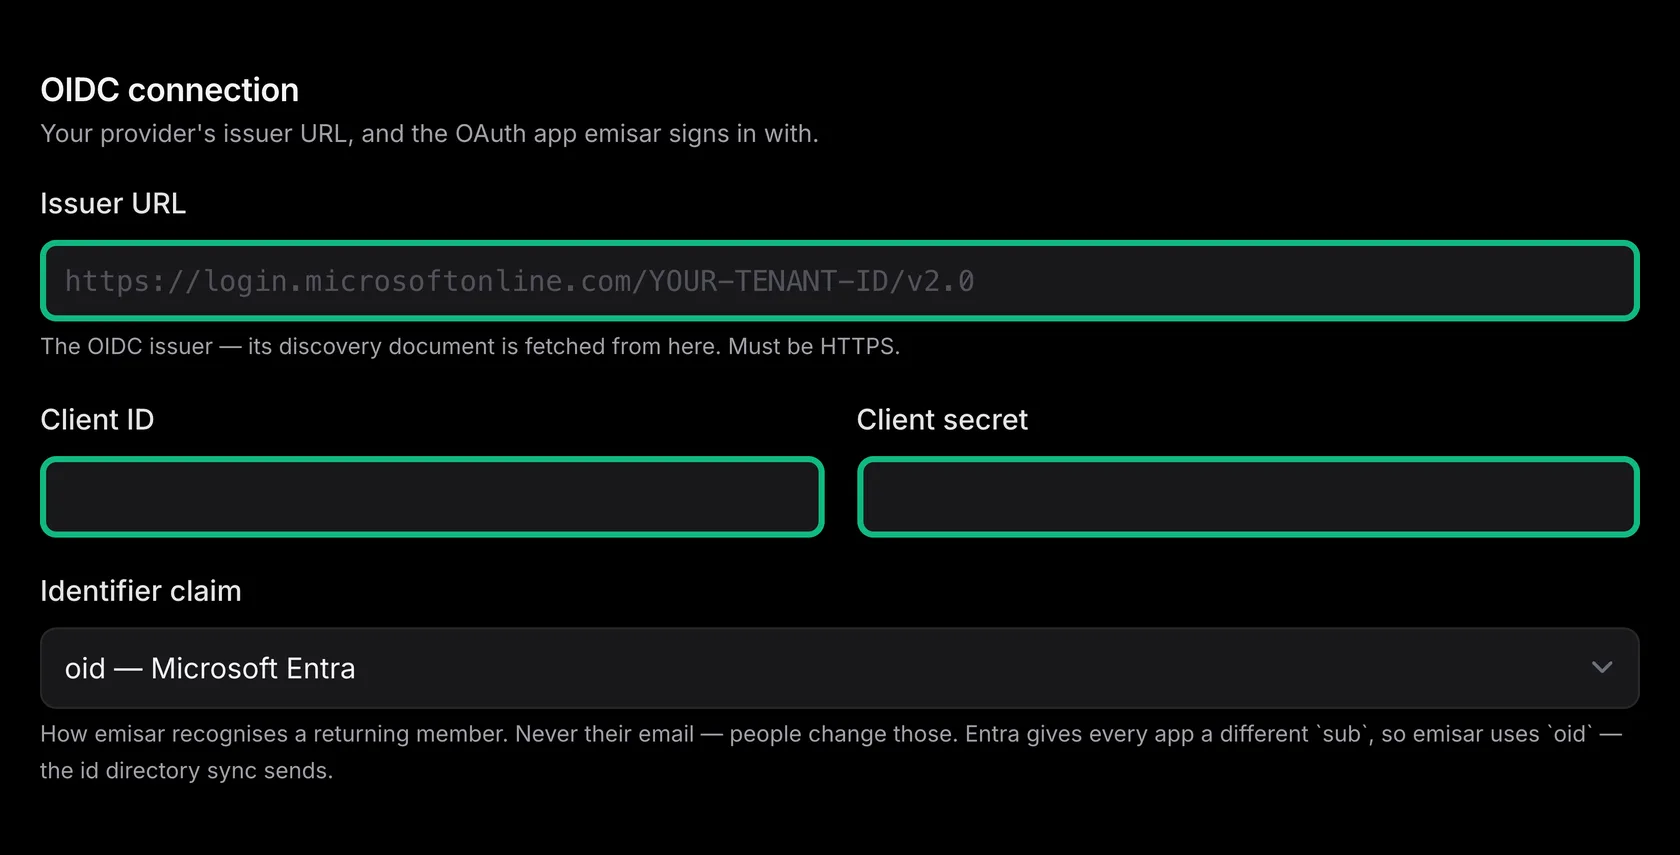
Return to the connection from step 1. Use Application (client) ID as the client ID. Use the secret from step 3. Build the issuer from your tenant ID.
Issuer URL
https://login.microsoftonline.com/YOUR-TENANT-ID/v2.0The trailing
/v2.0selects Entra's v2.0 endpoint. Without it, Entra returns v1.0 tokens. The identifier claim is alreadyoid. Entra assigns a differentsubto each application. Theoidclaim also matches the value directory sync sends.Select Add connection, then Verify sign-in. Complete the identity checks and sign in with your Entra user. This links your Entra identity to your current emisar member; directory sync is not required for this verification. Select Enable for members and confirm.
emisar · Add connectionThe issuer carries your tenant ID and ends in /v2.0. The identifier claim is already oid.
Directory sync#
Directory sync makes Entra responsible for the member lifecycle, provisioning people and
removing their access after offboarding. It also supplies the active identity record used
to join Entra's
oid
claim to sign-in.
Only available on Enterprise.
With directory sync enabled, provision members before they sign in. When Entra's
ID token omits email_verified, emisar matches
its
oid
to an active member provisioned by
this Entra connection, not by email. Map SCIM
externalId
to Entra's
objectId
so both flows use the same identifier.
You need the connection's SCIM base URL and bearer token — enabling directory sync shows where both come from.
-
1
In Entra
Create the enterprise application.
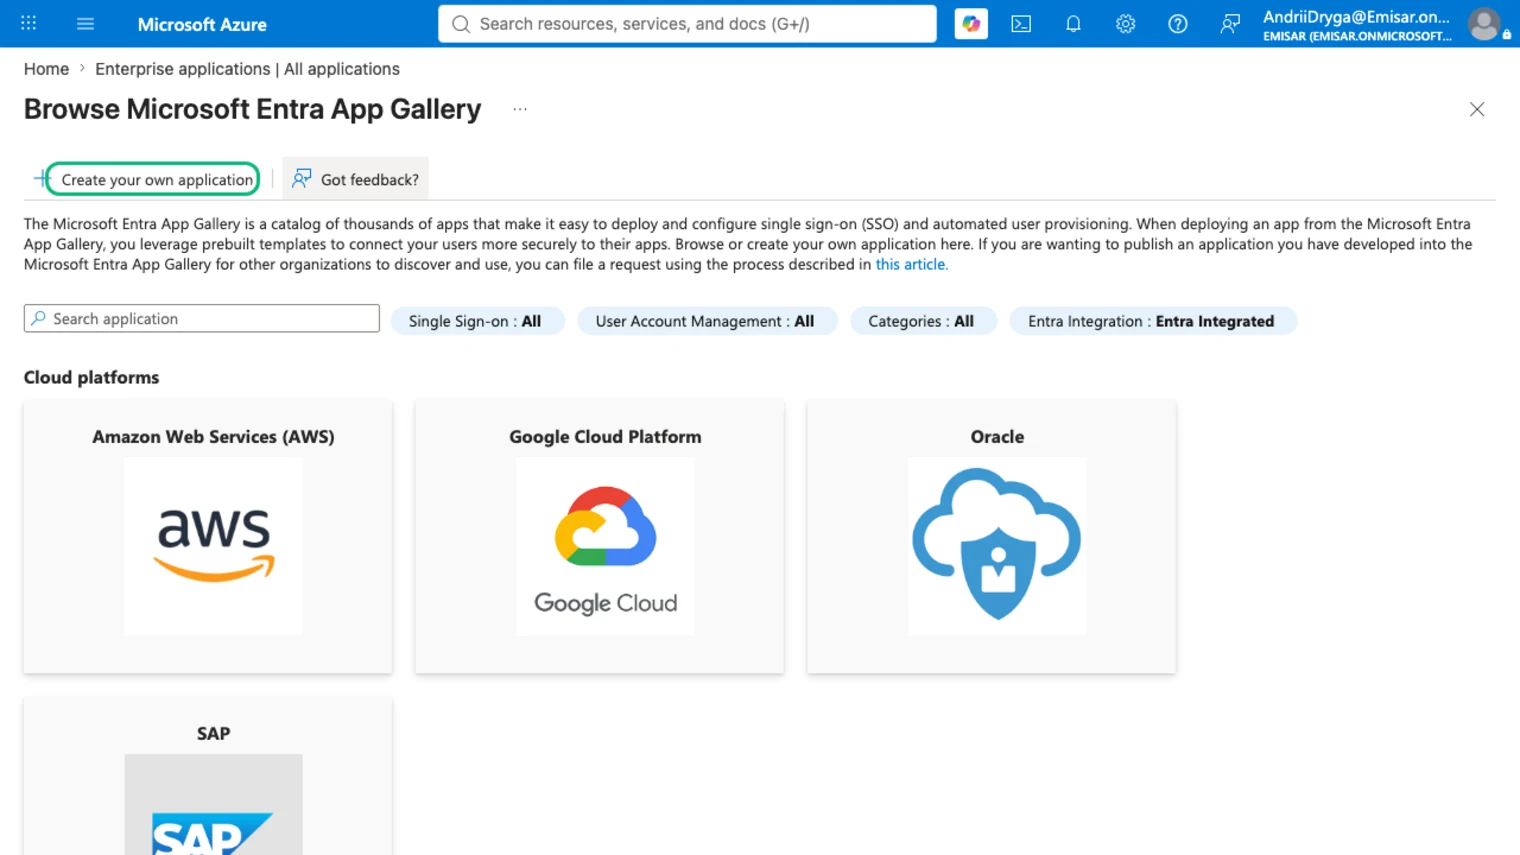
Provisioning needs a separate object from the sign-in app registration. Go to Enterprise applications → New application → Create your own application. Name it
emisar. Choose Integrate any other application you do not find in the gallery.Microsoft Entra · Browse App GalleryThe gallery is for apps Microsoft already ships an integration for. emisar is not one, so it is created by hand. -
2
In Entra
Point it at emisar.
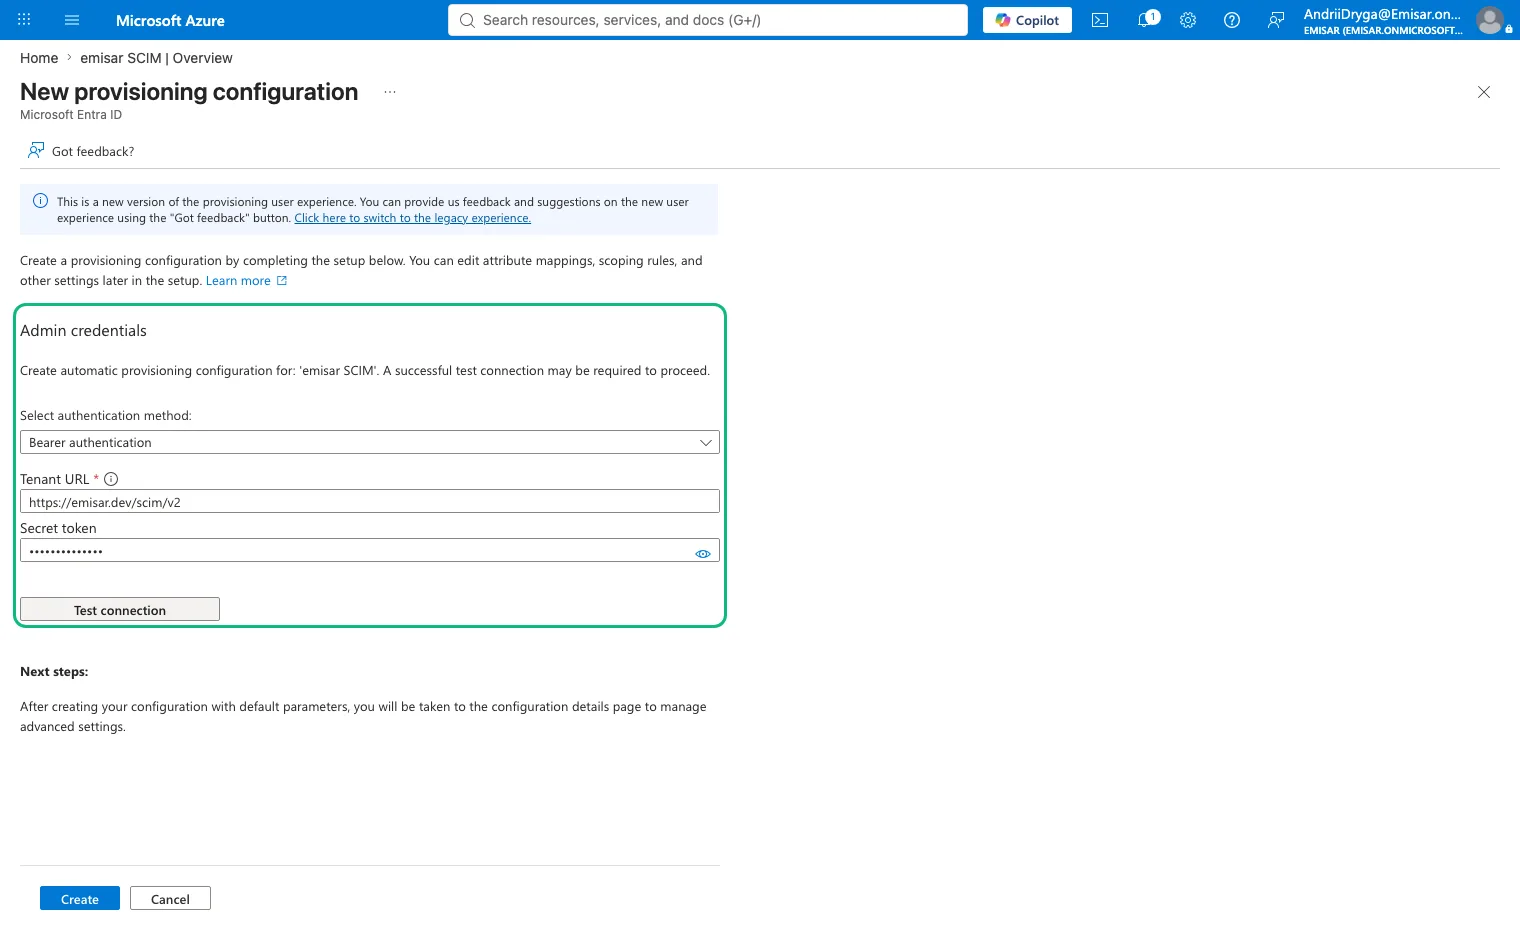
On the new application's Provisioning page, set Provisioning Mode to Automatic. Enter the SCIM base URL as Tenant URL. Enter the bearer as Secret Token.
Tenant URL
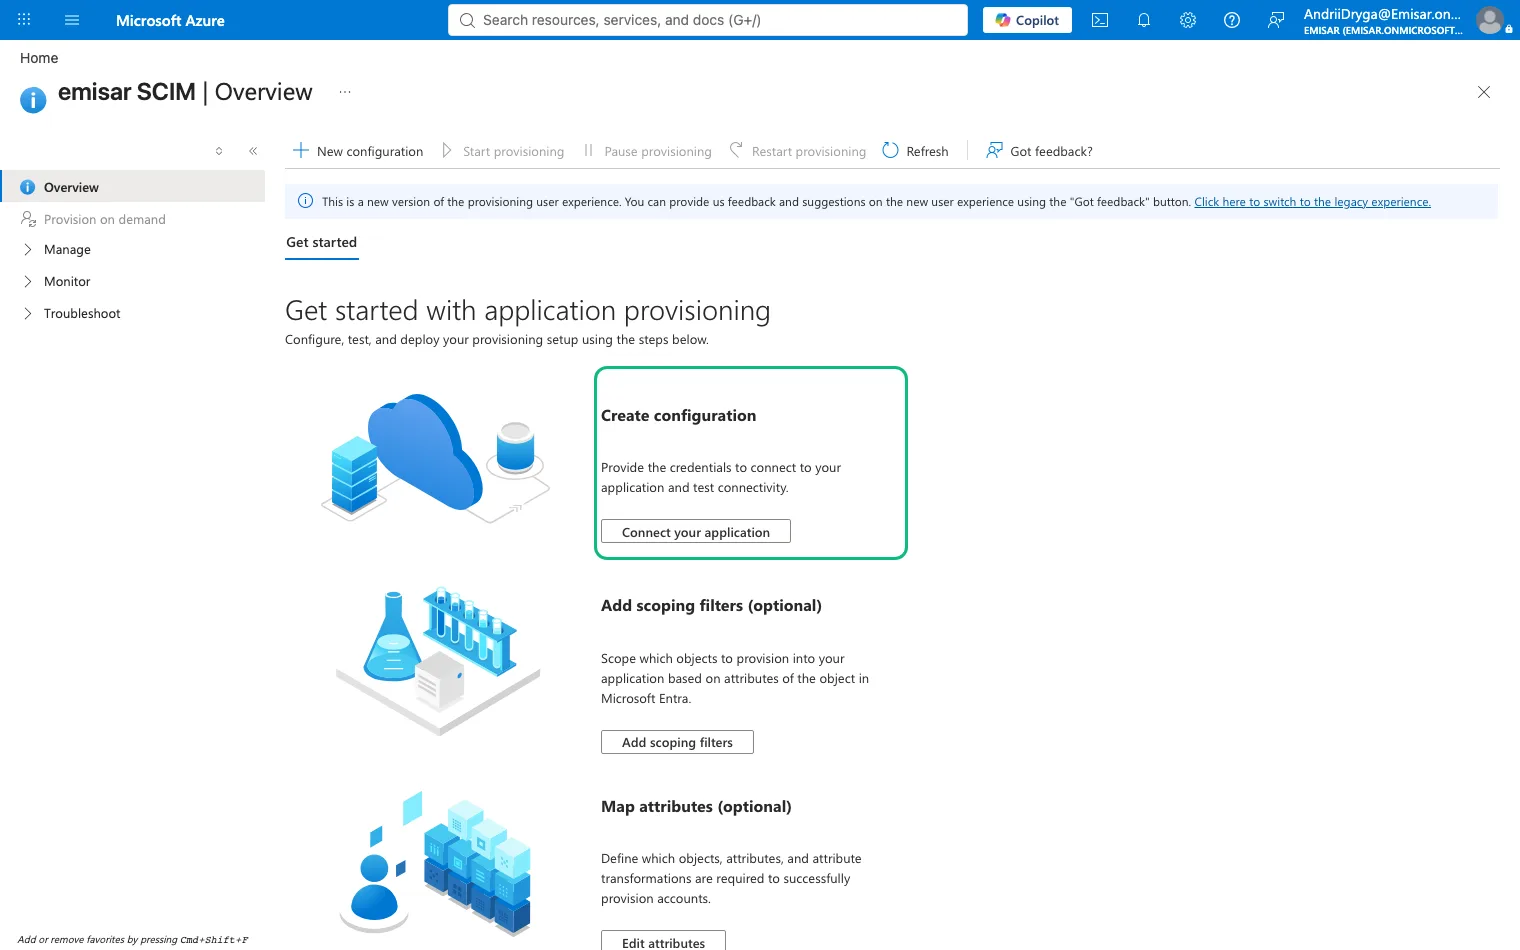
https://emisar.dev/scim/v2Microsoft Entra · Enterprise application provisioningAfter the live test, the Provisioning overview reported a completed incremental cycle with one group and two users. Press Test Connection. Entra queries a random GUID that cannot exist. It expects an empty result, not an error. emisar returns that result. A failure means the URL or token is wrong, not the schema. Save.
Microsoft Entra · ConnectivityLeave authentication on Bearer. Tenant URL and the masked bearer sit together above Test connection. -
3
In Entra
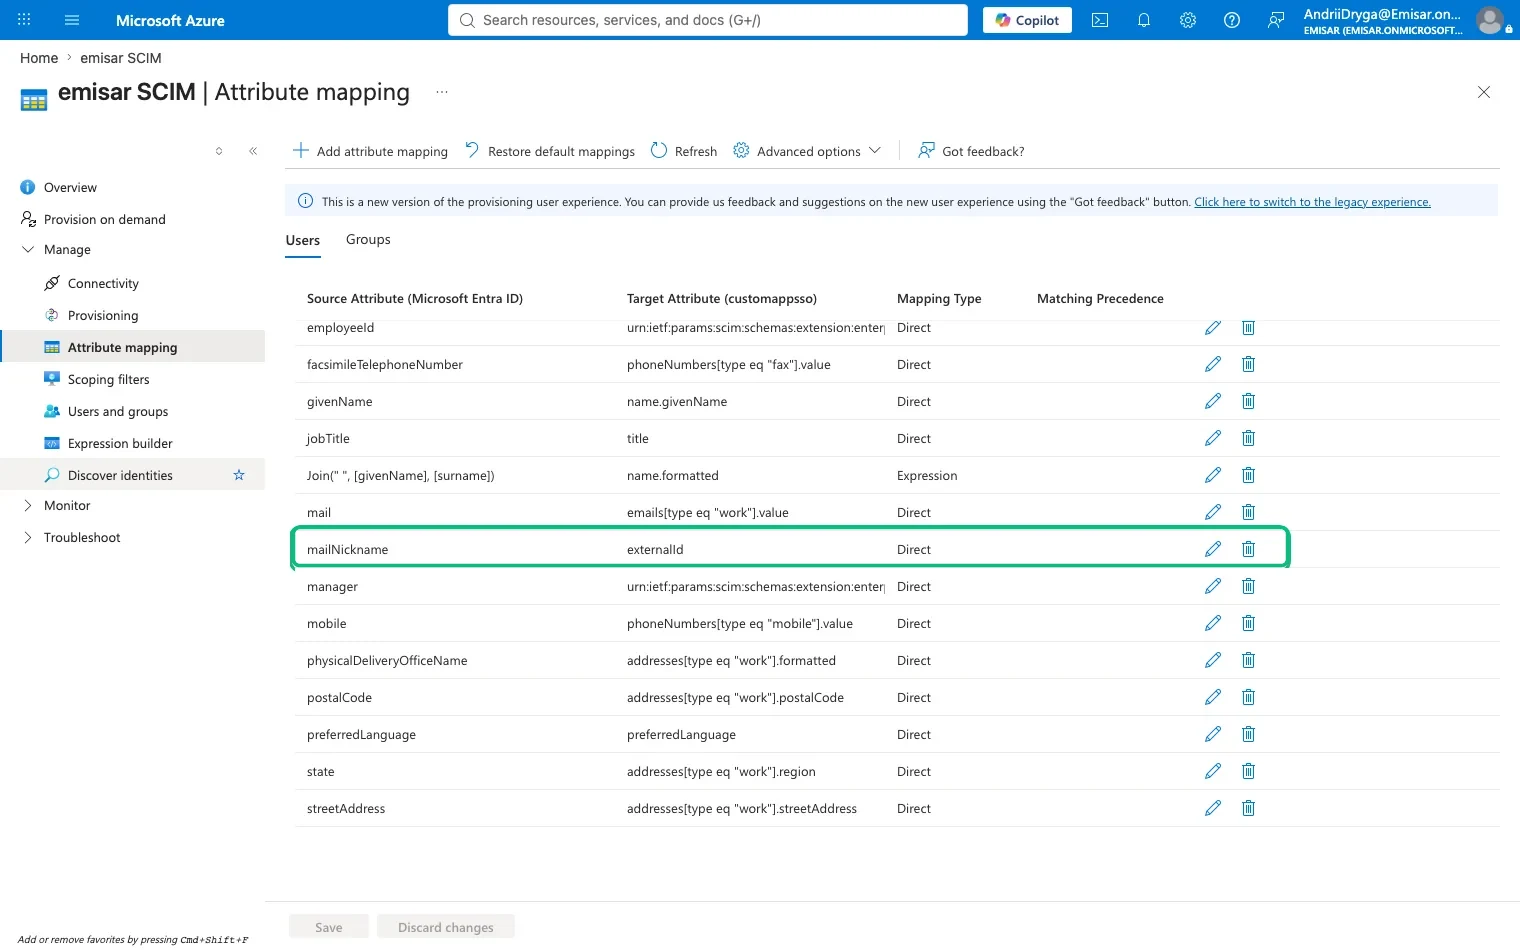
Remap externalId to objectId.
Open Manage → Attribute mapping and change the source attribute feeding
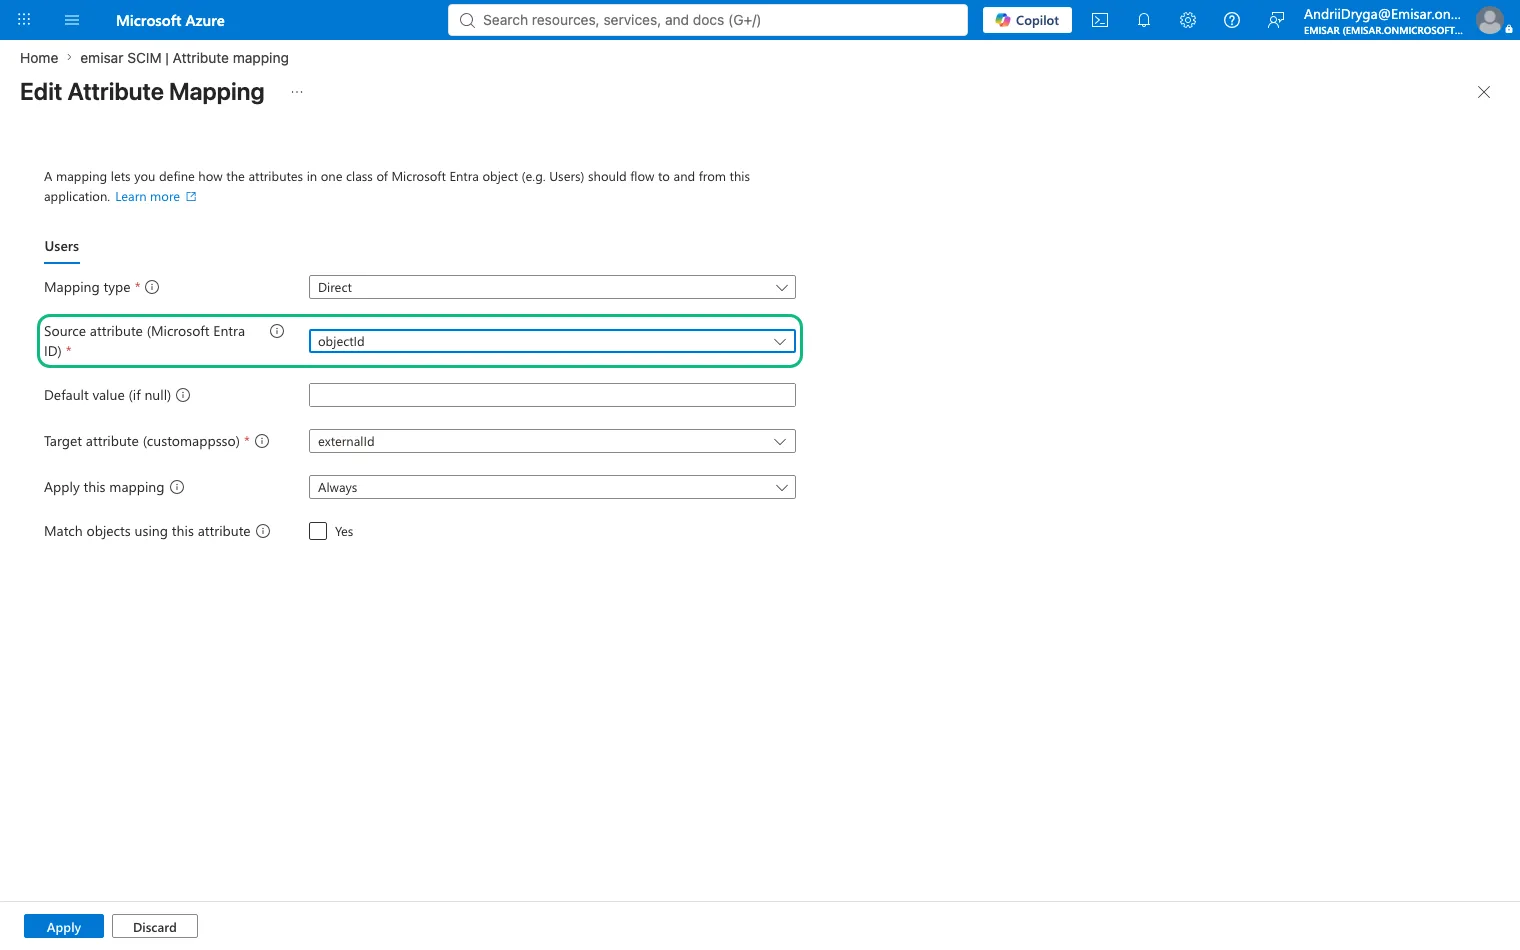
externalIdfrommailNicknametoobjectId. On a tenant still using Entra's older provisioning screens, the same setting lives under Mappings → Provision Microsoft Entra ID Users.Microsoft Entra · Attribute mappingThe saved result: objectId now feeds externalId. Open this row to verify the complete mapping. Microsoft Entra · Edit Attribute MappingChange the source, not the target — externalId must stay aligned with the OIDC oid claim. Entra defaults to
mailNickname. This value can be missing, duplicated, or changed. It also differs from the identifier used by the sign-in connection. If SSO usesoidwhile SCIM usesmailNickname, sign-in cannot match the synced member and waits for administrator approval.objectIdis the same immutable value asoid, so both flows identify one person. -
4
In Entra
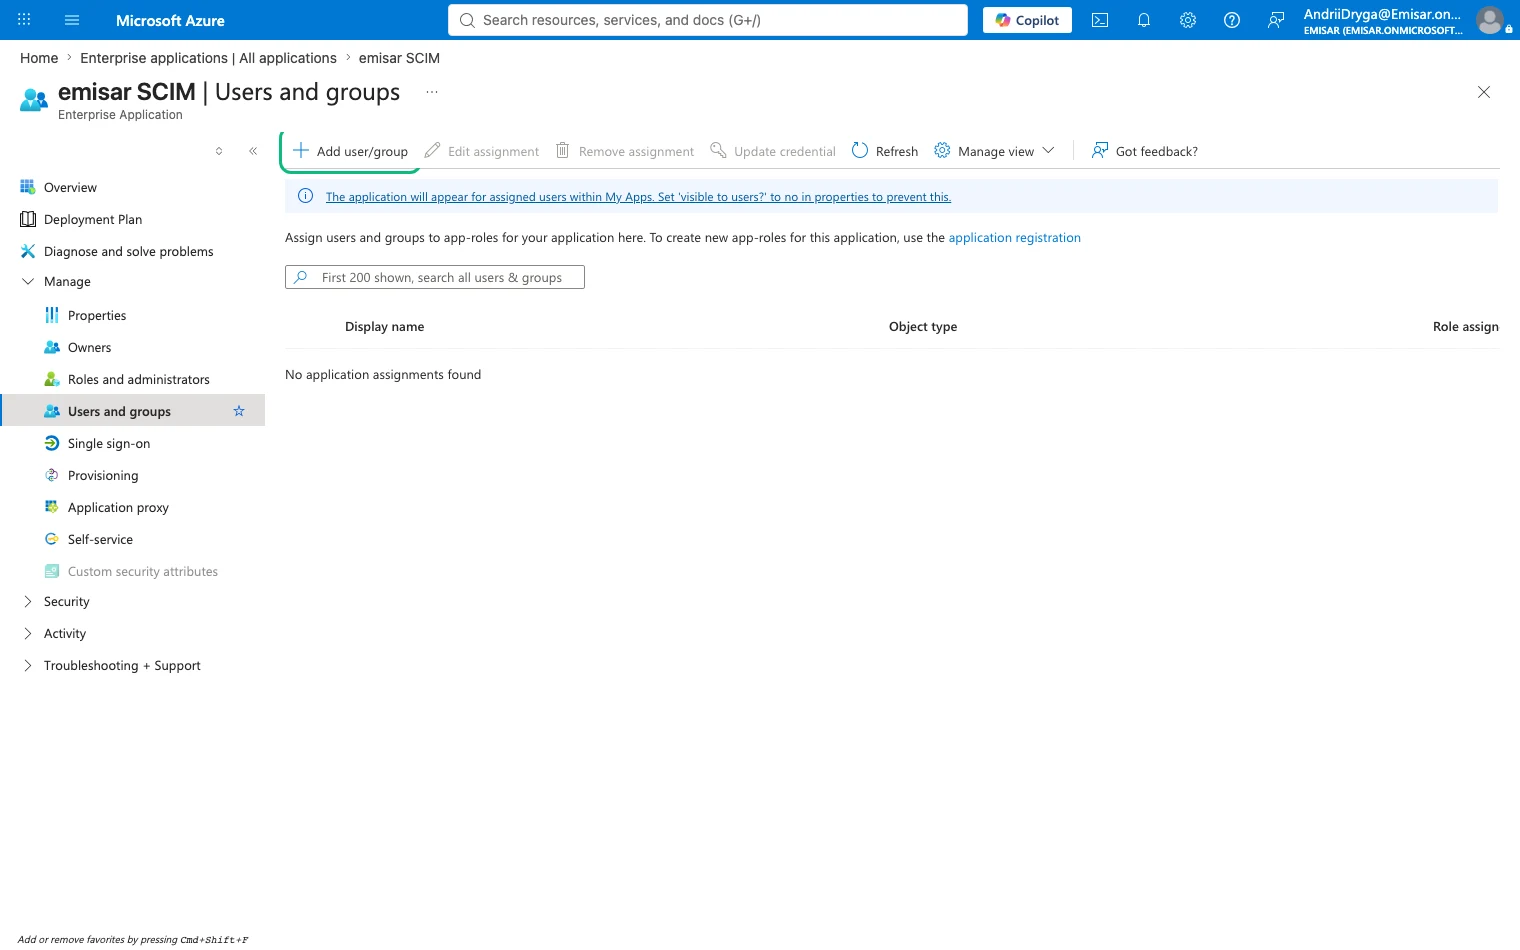
Assign the people to sync.
Under Users and groups, assign each person who needs an emisar account. Then, on Provisioning → Settings, set Scope to Sync only assigned users and groups and turn Provisioning Status on. Scope is separate from assignment and defaults to everyone. Change it, or Entra sends the entire directory regardless of assignment. Entra syncs roughly every 40 minutes. New members appear under Members after the next cycle, not immediately. Their Entra groups then appear under Groups & access.
Entra · Users and groupsThe certification group is assigned here and was provisioned to emisar.
Next: configure Role mapping so directory groups grant the right Emisar role.