
Docs navigation
Get started
AI agents
Connect
Operate
Day to day
When it breaks
Govern access
Team & account
Access
Identity concepts
Provider guides
Account
Google Workspace
Connect Google Workspace to emisar: an Internal OAuth client and a locked, prefilled issuer. Google has no outbound SCIM — the directory-sync section covers the gap.
This is the shortest provider setup because the issuer is prefilled.
- A Google Cloud project in the same organization as your Workspace.
- An emisar owner or admin.
Single sign-on#
Connecting an identity provider is a paid feature. Only available on Team & Enterprise.
-
1
In emisar
Start the connection.
Open Team → Single sign-on → Add connection and choose Google Workspace. Leave the page open: the callback URL on it is what Google asks for next, and Google's values come back here at the end.
emisar · Add connectionPicking the provider here tailors the rest of the form to it. -
2
In Google Cloud
Name the app your team will see.
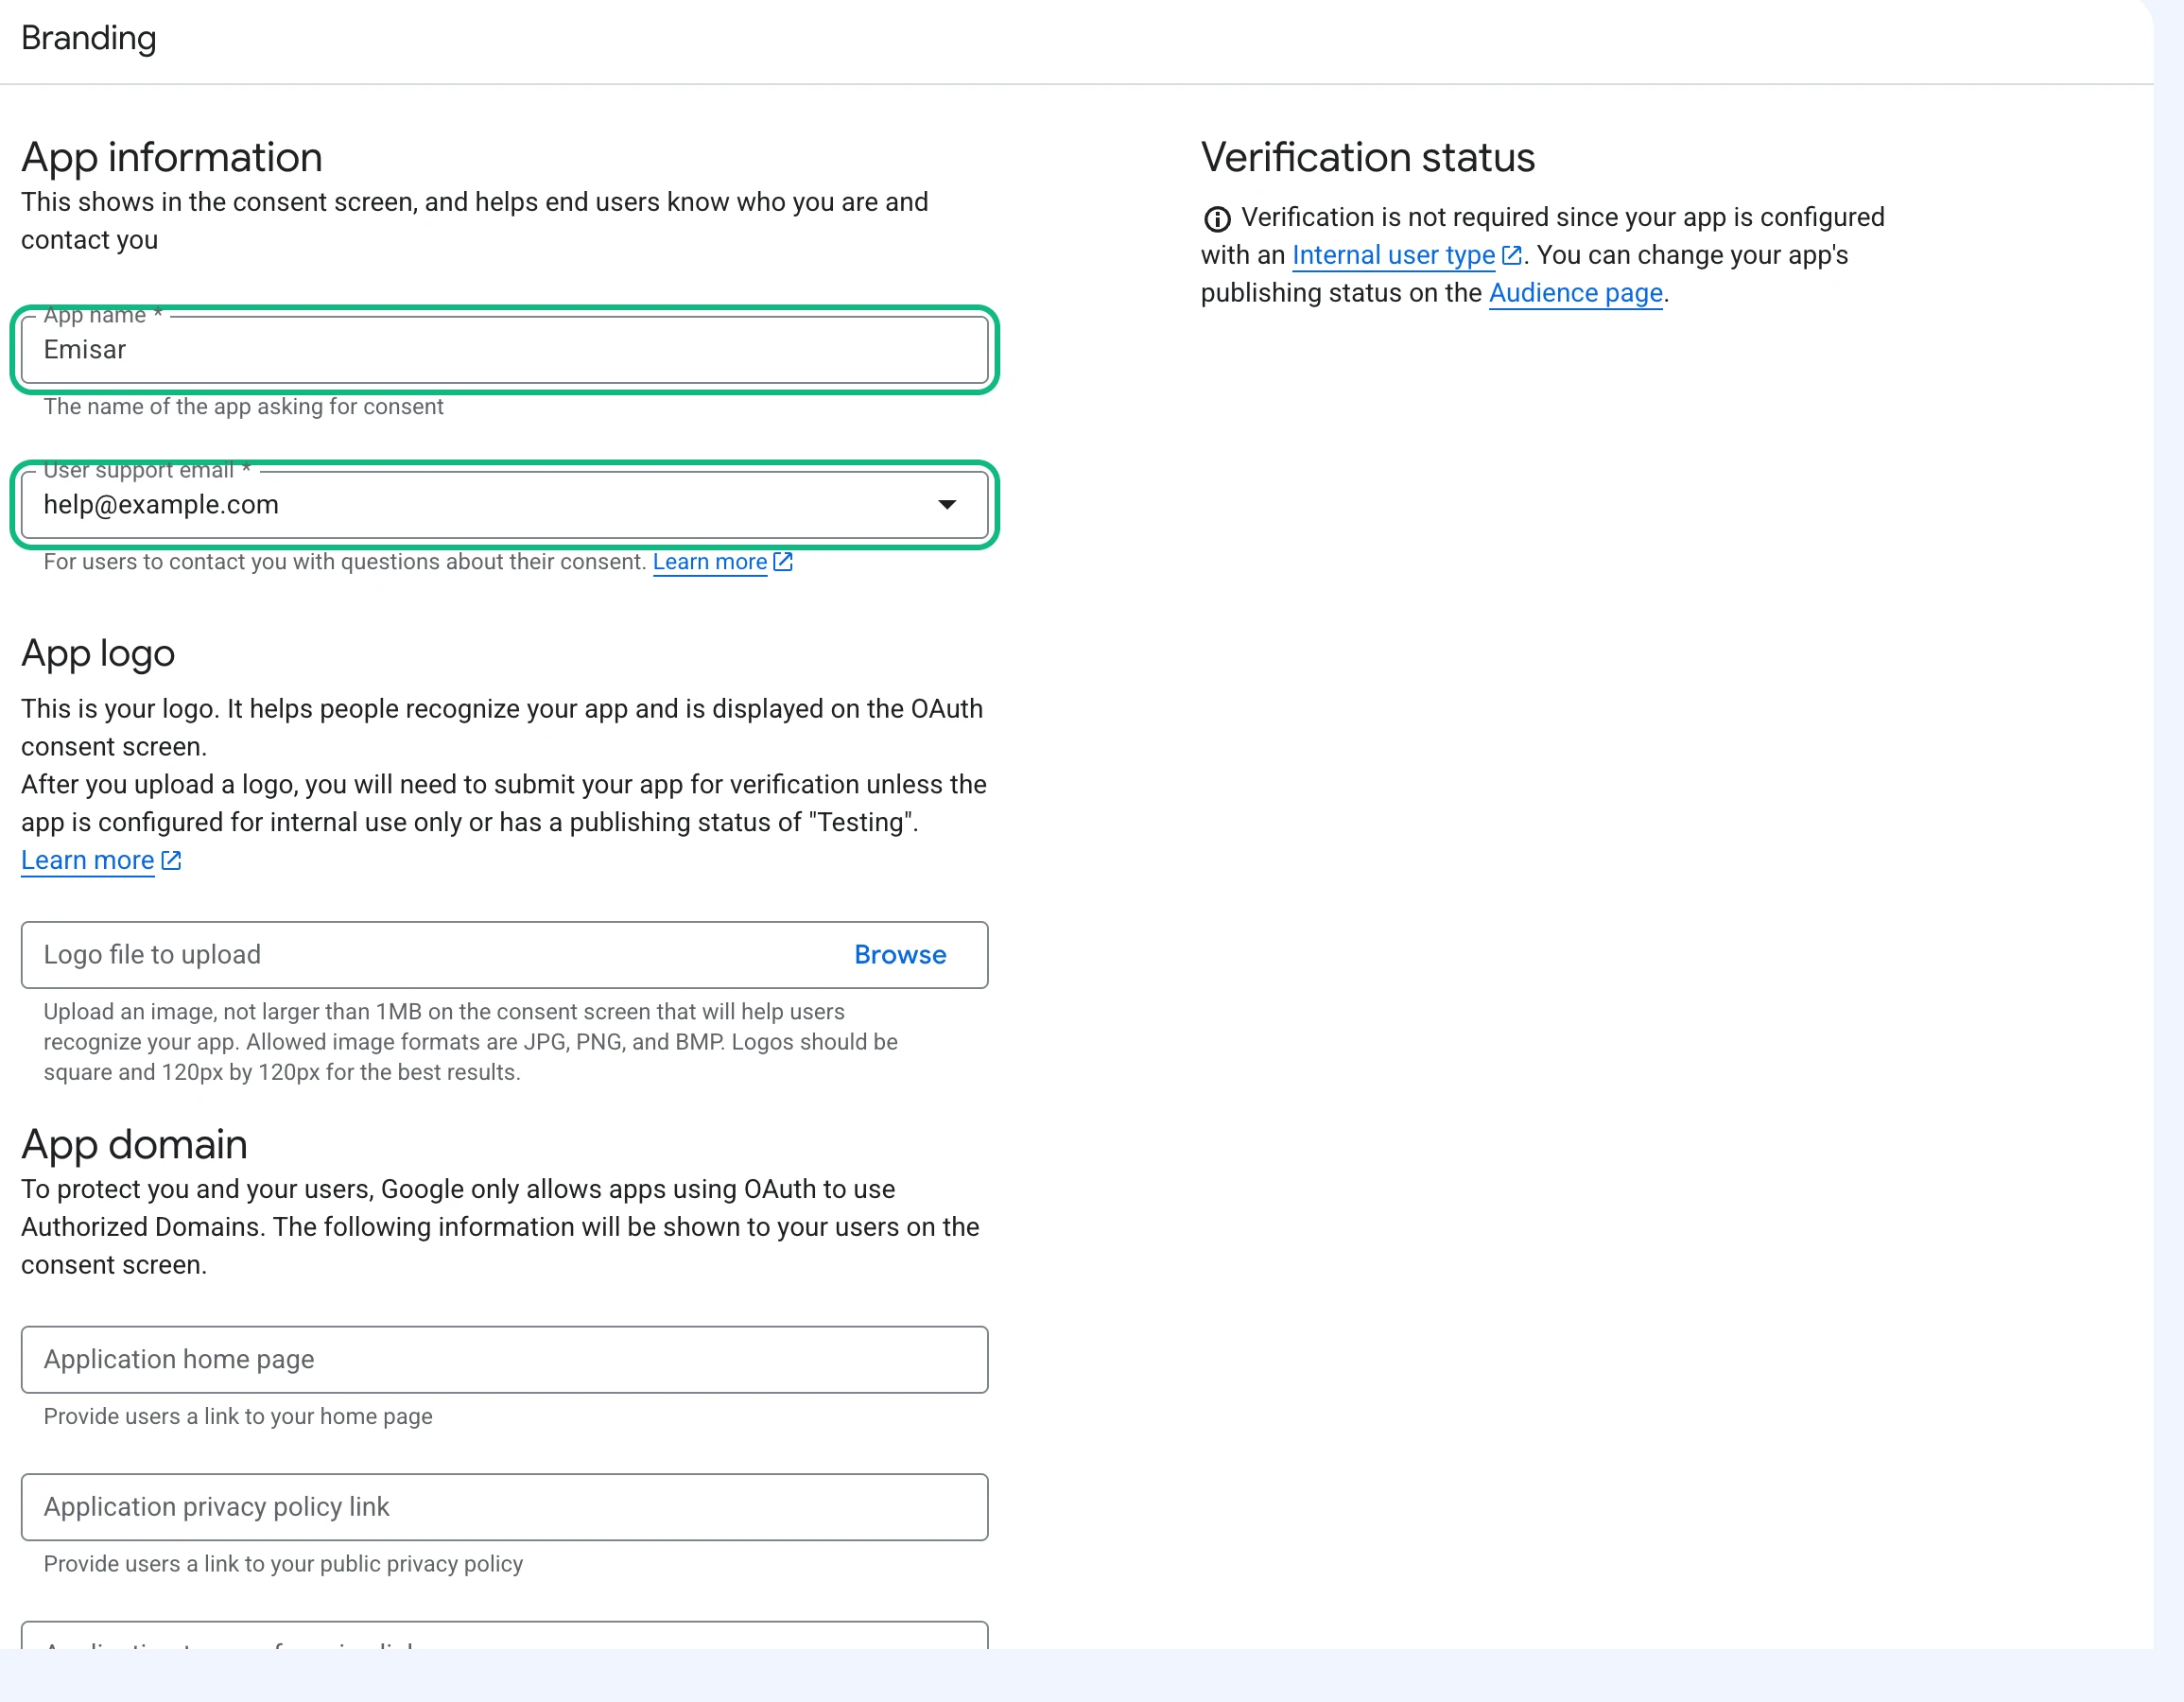
Open Google Auth Platform → Branding. The App name and User support email appear on Google's consent screen. Use a name your members recognize. On a new project, Google presents the same fields in the numbered setup shown next. The fields are identical.
Google Auth Platform · BrandingBoth values appear on the consent screen your members see. -
3
In Google Cloud
Keep the audience Internal.
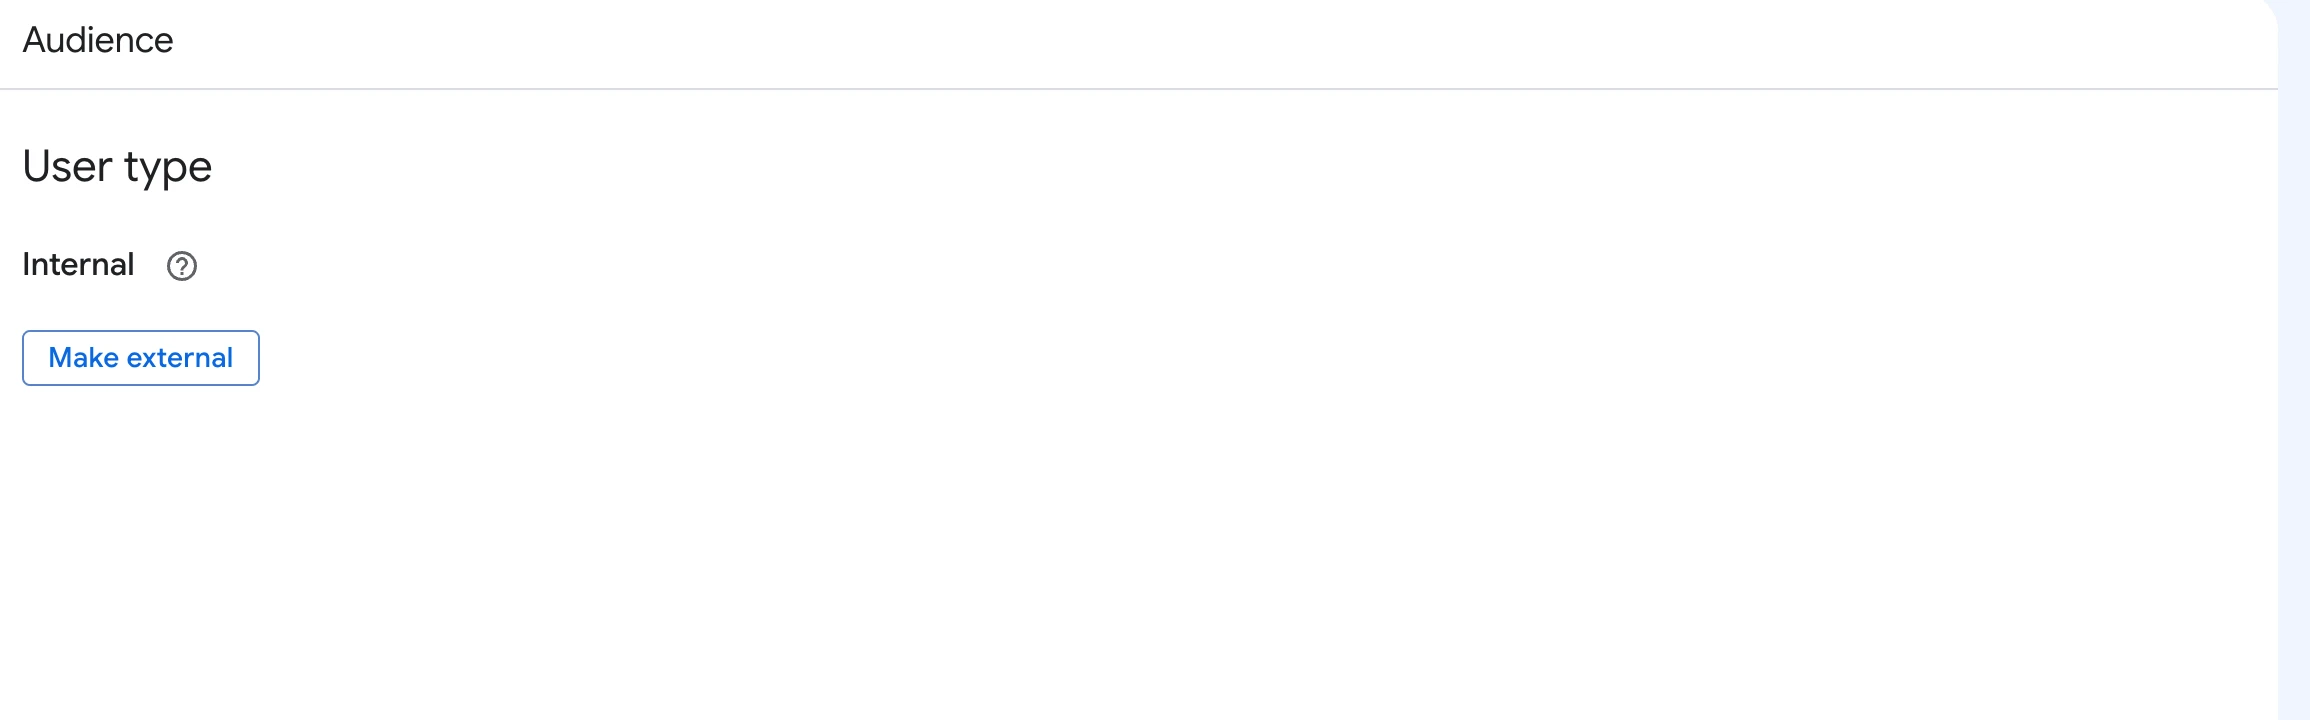
On Audience, the user type must be Internal. That restricts sign-in to your own Workspace domain and skips Google's verification review entirely. External allows any Google account. Do not use it for emisar. Google rejects outside accounts with
org_internalbefore the request reaches emisar.Google Auth Platform · AudienceInternal is the whole domain restriction. Google refuses outside accounts itself. -
4
In Google Cloud
Give Google a contact address, then create.
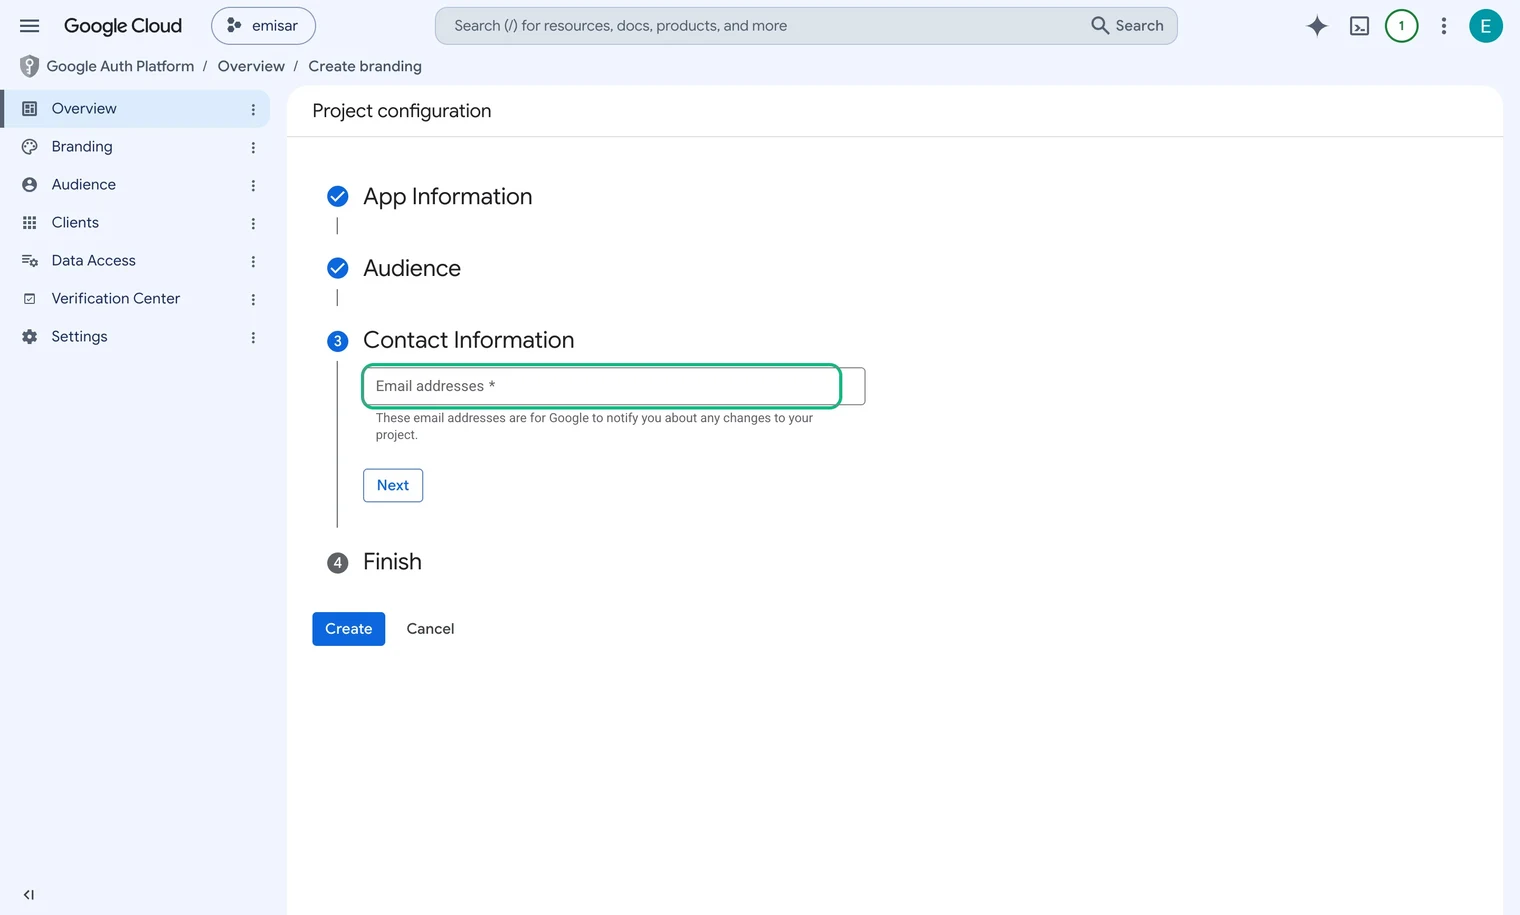
For a new project, complete Contact Information and Finish. Enter an address Google uses for project notices, then select Create. Both fields are required but do not control sign-in. The Audience setting already controls sign-in. An existing project does not show these fields. Go straight to Clients.
Google Auth Platform · Contact InformationGoogle writes here about the project, not about sign-ins. -
5
In Google Cloud
Start an OAuth client.
Open Clients → Create client. Existing clients are listed here too, so this is where you come back to if you need the client ID again.
-
6
In Google Cloud
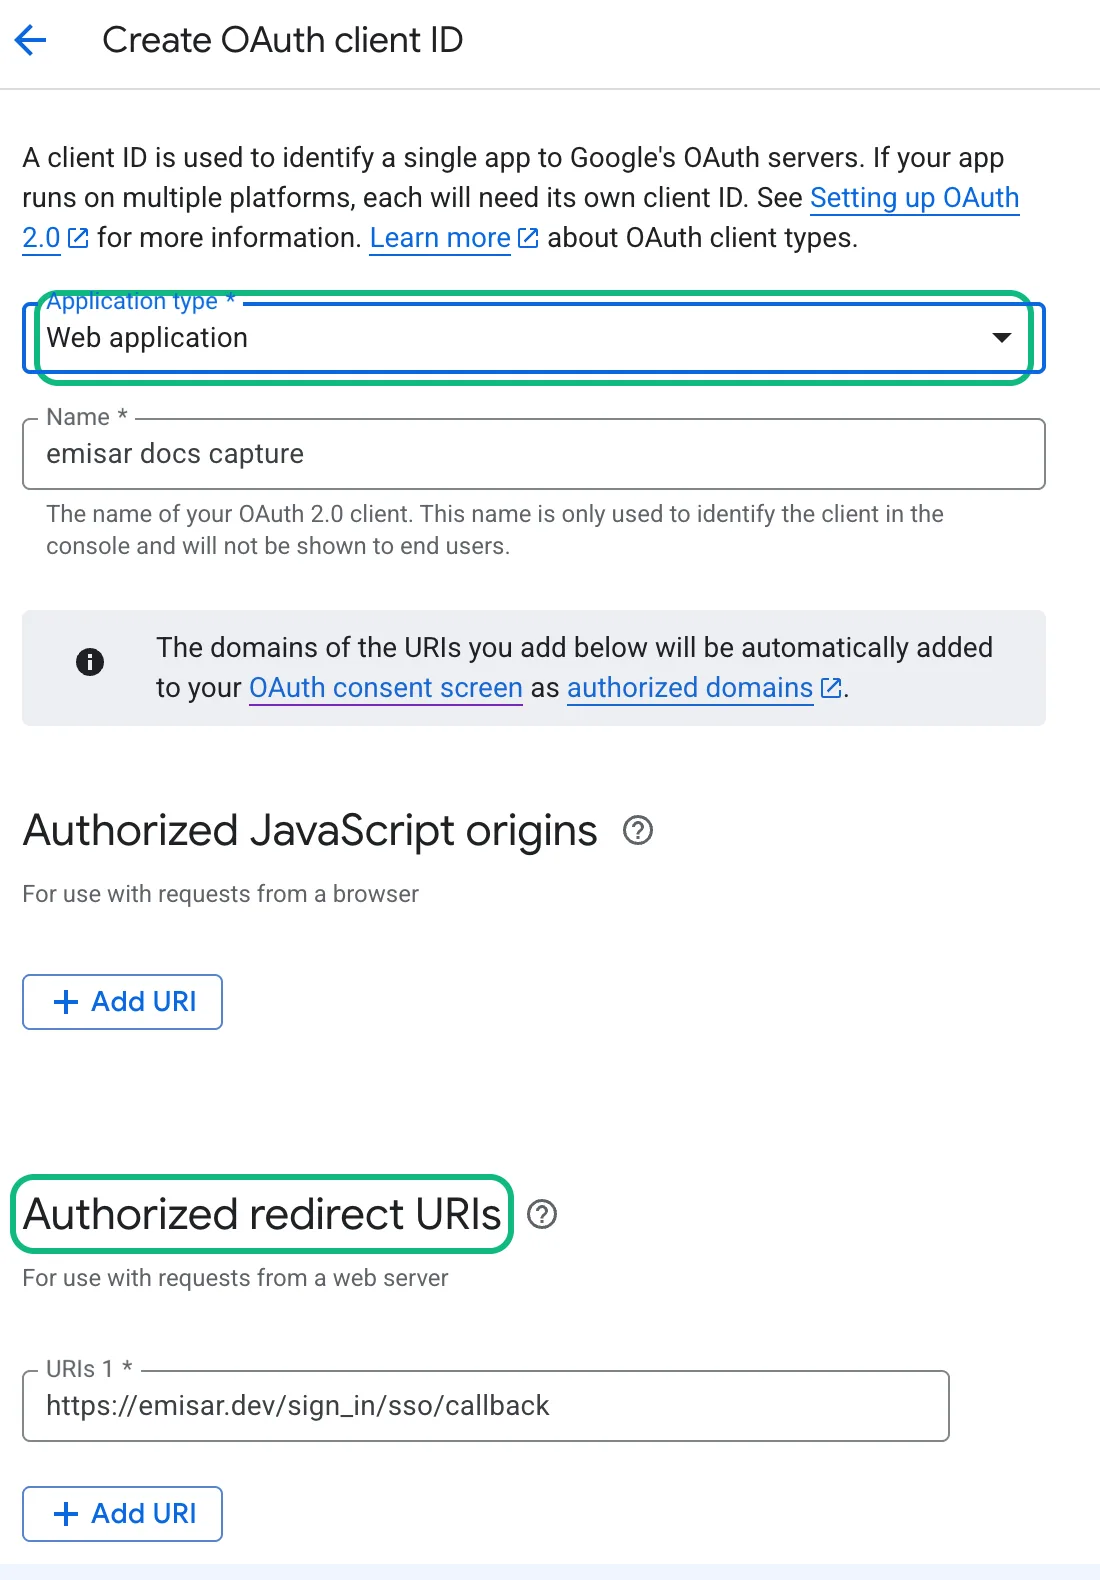
Make it a web application, with emisar's callback.
Set Application type to Web application. Put emisar's callback under Authorized redirect URIs.
Authorized redirect URI
https://emisar.dev/sign_in/sso/callbackMind which list it goes in — Authorized JavaScript origins sits directly above it and is not part of this flow. Google matches the URI exactly, so a trailing slash or
httpinstead ofhttpsis rejected at sign-in with aredirect_uri_mismatch, not at save time.Google Cloud · Create OAuth client IDThe callback belongs under Authorized redirect URIs, not the JavaScript origins above it. -
7
In Google Cloud
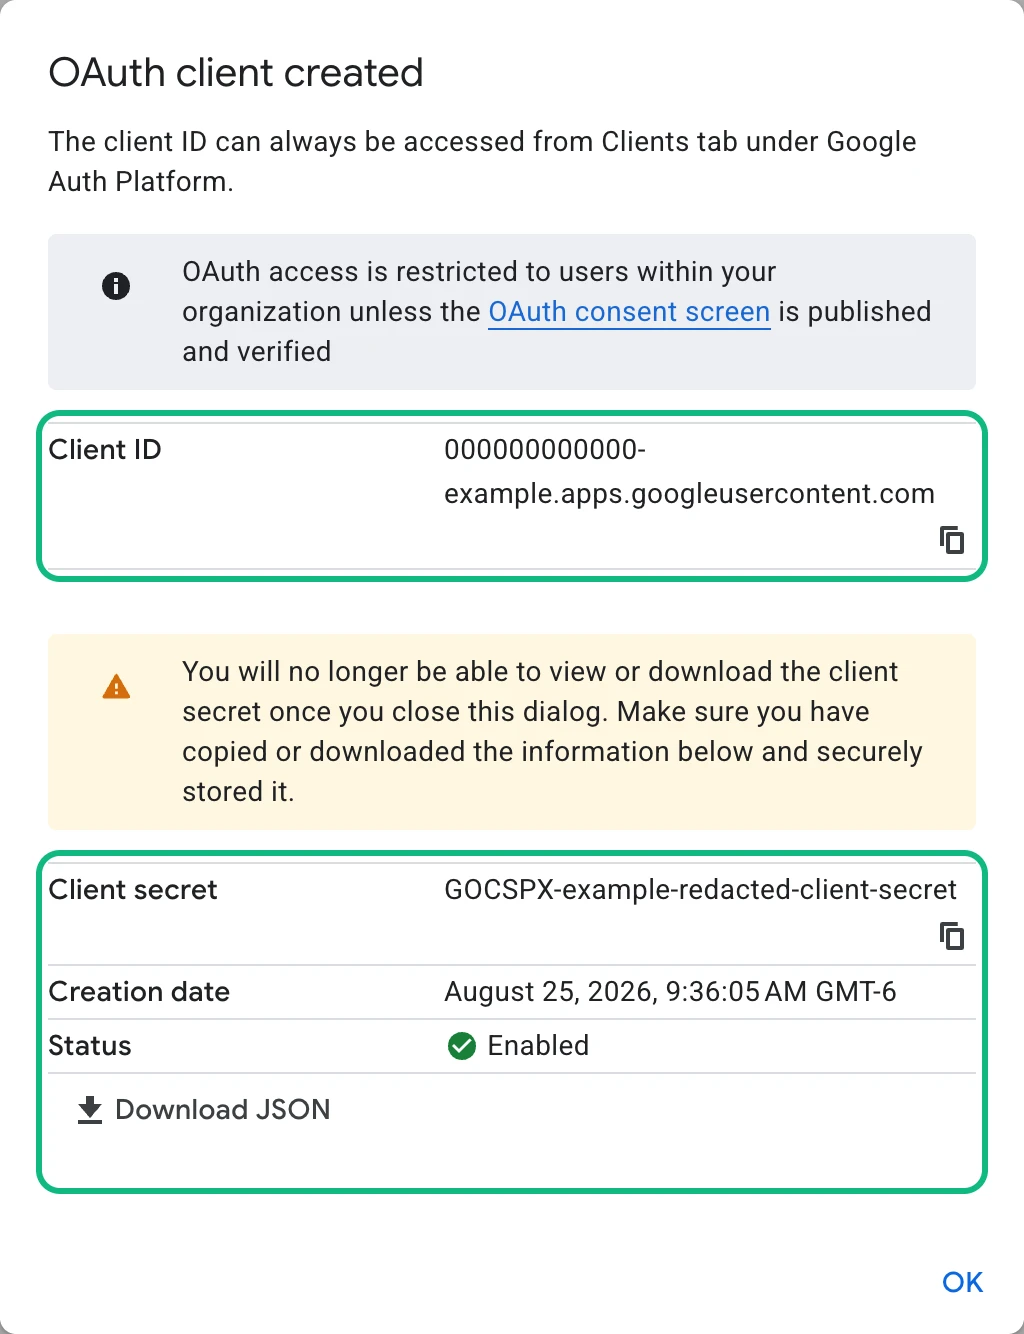
Copy both values before you close the dialog.
Google shows the client ID and secret once. You cannot read the secret again. Copy both now or create another client later.
Google Cloud · OAuth client createdThe secret is shown once. Both values are redacted here; yours are real. -
8
In emisar
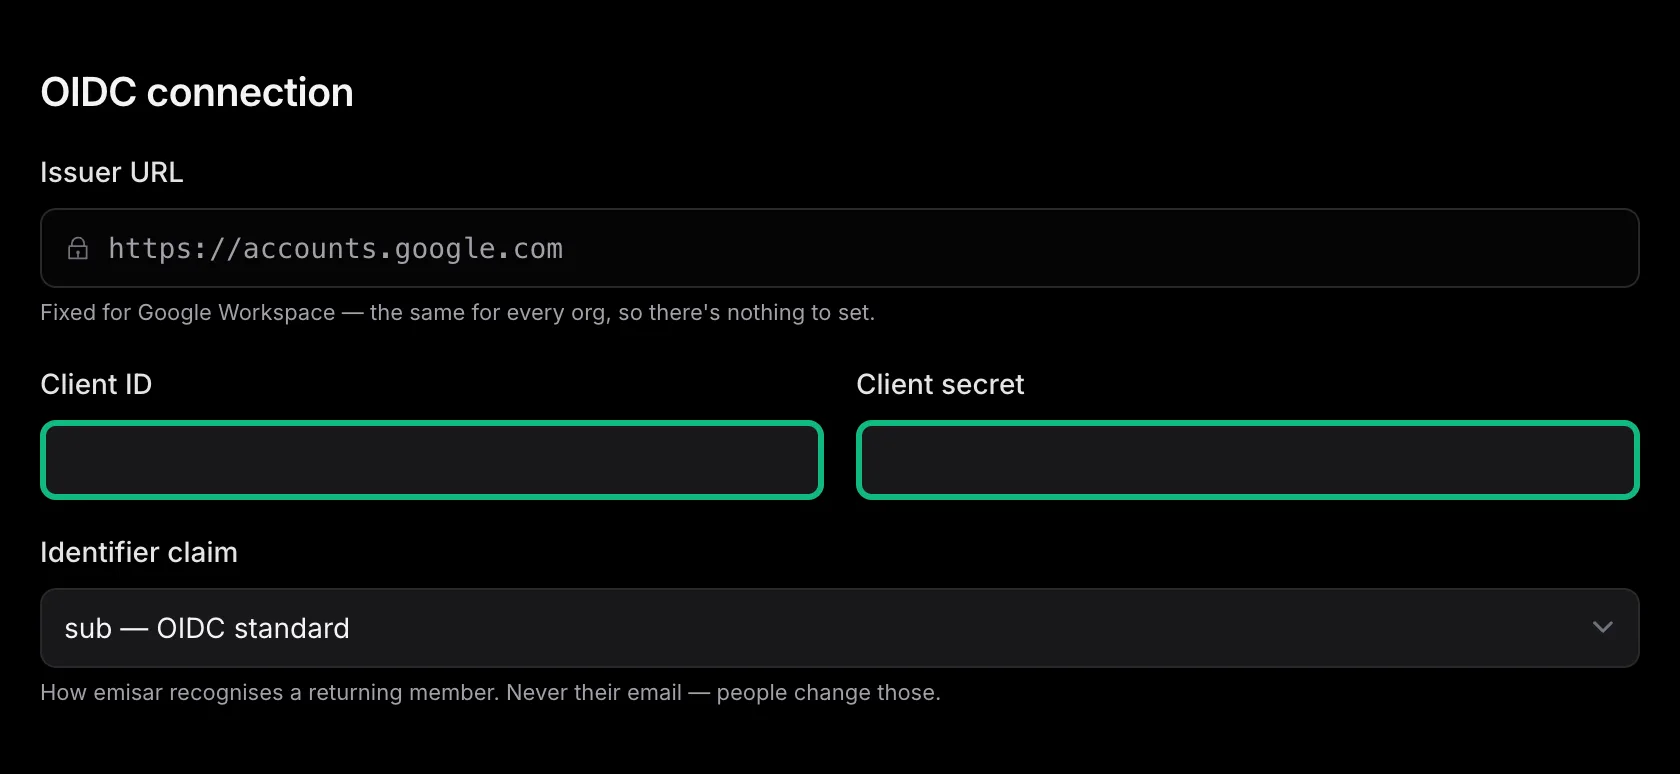
Paste the credentials into emisar.
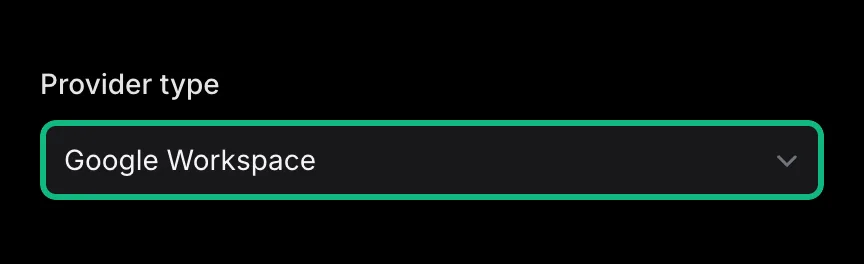
Pick Google Workspace as the provider type and paste the client ID and secret. The Issuer URL is already filled in and locked —
https://accounts.google.comfor every Google customer — so it is one less thing to get wrong. Leave the identifier claim onsub. Select Add connection, then Verify sign-in and complete the identity checks. After verification, select Enable for members and confirm.emisar console · Add connectionPicking Google Workspace locks the issuer to https://accounts.google.com — the padlock means there is nothing for you to look up or mistype.
This guide covers only the provider-specific fields. Single sign-on explains provisioning, default roles, runner access, and provider MFA settings.
Directory sync#
Google Workspace cannot push users to emisar — it provisions only applications in its SaaS catalog, and the custom OAuth client created above has no SCIM connector, so emisar hides the sync panel. With Add on first sign-in selected, new members receive the connection's default role and access. With Require approval selected, their first sign-in waits for administrator approval. Neither setting removes members automatically.
Offboarding is therefore two steps: suspend the Google account to block new sign-ins, then suspend or remove the member in Team to end their sessions and revoke their API keys.
Route Google through an IdP that does have outbound SCIM — Okta, Entra or JumpCloud —
and connect that
to emisar. An offboard in Google then reaches us as the standard
active: false
signal and access is revoked without anyone touching emisar.
Federating sign-in through that IdP is not by itself a lifecycle feed. The IdP must manage those people through provisioning or synchronization. Its directory then tells emisar when a person leaves. Most organizations that federate Google already sync their staff into the same IdP, so there is usually nothing new to set up.
If the absence of Google directory sync is a deal-breaker for you, contact our sales team.