
Docs navigation
Get started
AI agents
Connect
Operate
Day to day
When it breaks
Govern access
Team & account
Access
Identity concepts
Provider guides
Account
Okta
Connect Okta to emisar: one OIDC web app for sign-in, one SCIM app for the directory — provisioning, offboarding, and group-driven roles.
- An Okta administrator.
- An emisar owner or admin.
Single sign-on#
Connecting an identity provider is a paid feature. Only available on Team & Enterprise.
-
1
In emisar
Start the connection.
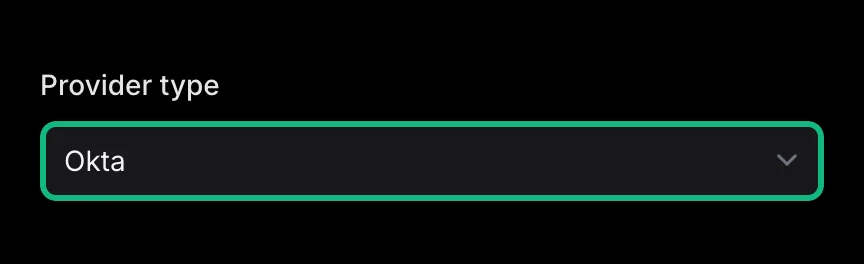
Open Team → Single sign-on → Add connection and choose Okta. Leave the page open: the callback URL on it is what Okta asks for next, and Okta's values come back here at the end.
emisar · Add connectionPicking the provider here tailors the rest of the form to it. -
2
In Okta
Create an OIDC web application.
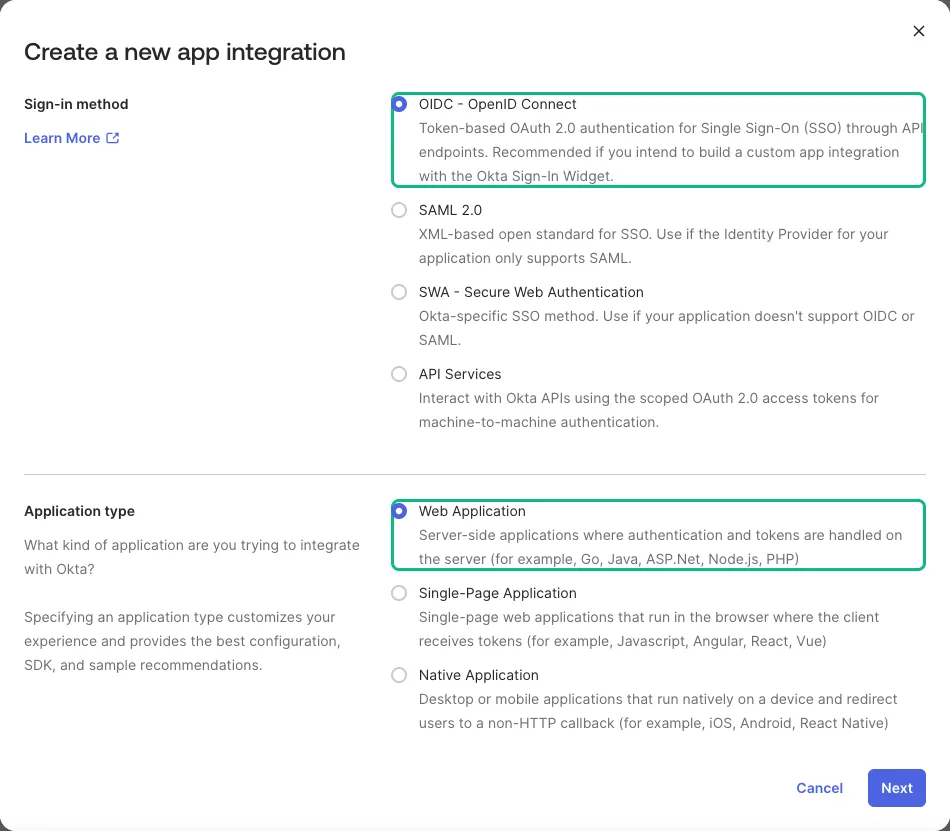
In the Okta Admin Console go to Applications → Applications → Create App Integration. Choose OIDC - OpenID Connect as the sign-in method. Then choose Web Application as the application type. This creates the confidential client emisar needs. It authenticates with a client secret.
Okta Admin Console · Create a new app integrationPick OIDC, and the Application type choices appear below it — emisar is a Web Application. -
3
In Okta
Register emisar's callback as the only redirect.
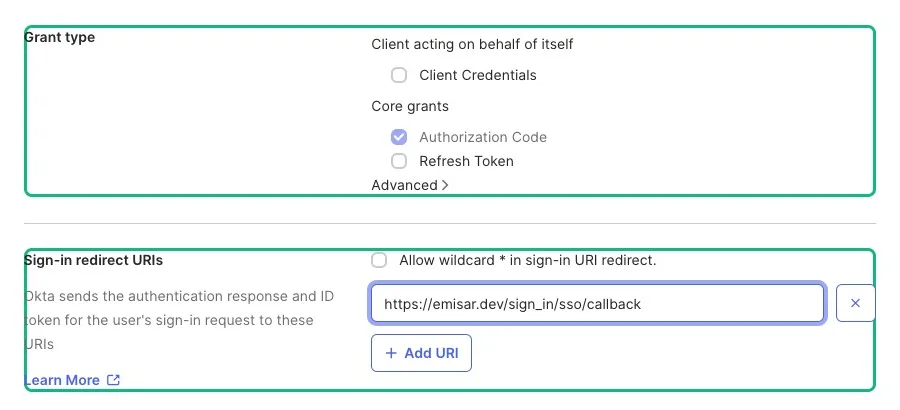
Name the application, then set the sign-in controls explicitly:
- Application name
-
Use
emisar, or another name your administrators will recognize. - Sign-in redirect URIs
-
Copy the callback from the Add connection page. It ends with
/sign_in/sso/callbackon your emisar host. Keep it as the only entry. - Allow wildcard *
- Leave it off. A wildcard broadens which redirect destinations Okta will trust.
- Grant type
- Leave Authorization Code selected.
- Assignments
- Choose Skip group assignment for now. Okta app assignment controls who may sign in; Emisar's Role mapping separately controls which Emisar role a synced directory group grants.
Okta Admin Console · New Web App IntegrationOne sign-in redirect URI, wildcard off, Authorization Code. Clear the sign-out box — emisar doesn't use it. -
4
In Okta
Copy the client credentials.
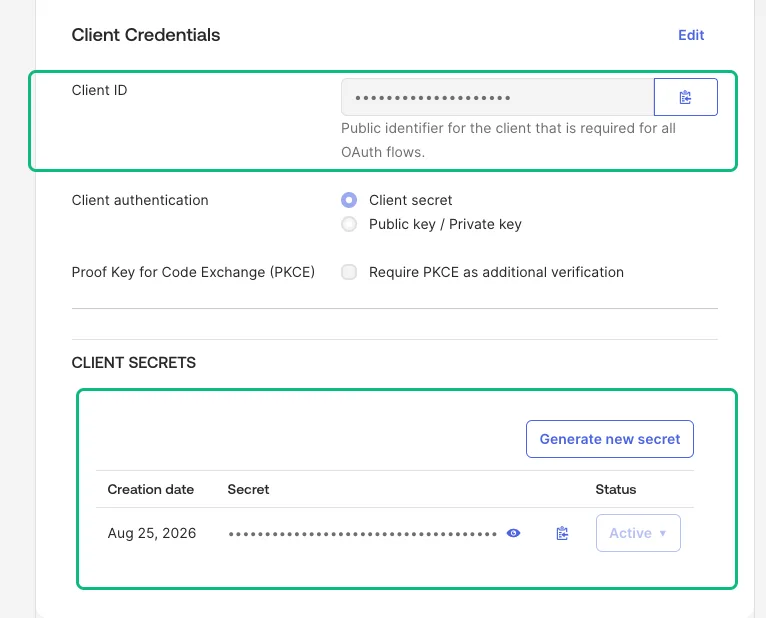
Saving lands you on the app's General tab with its Client ID and Client secret. You need both, plus your issuer.
Okta Admin Console · Client CredentialsKeep Client authentication on Client secret — emisar is a confidential client and replays that secret to your IdP. -
5
In emisar
Connect it in emisar.
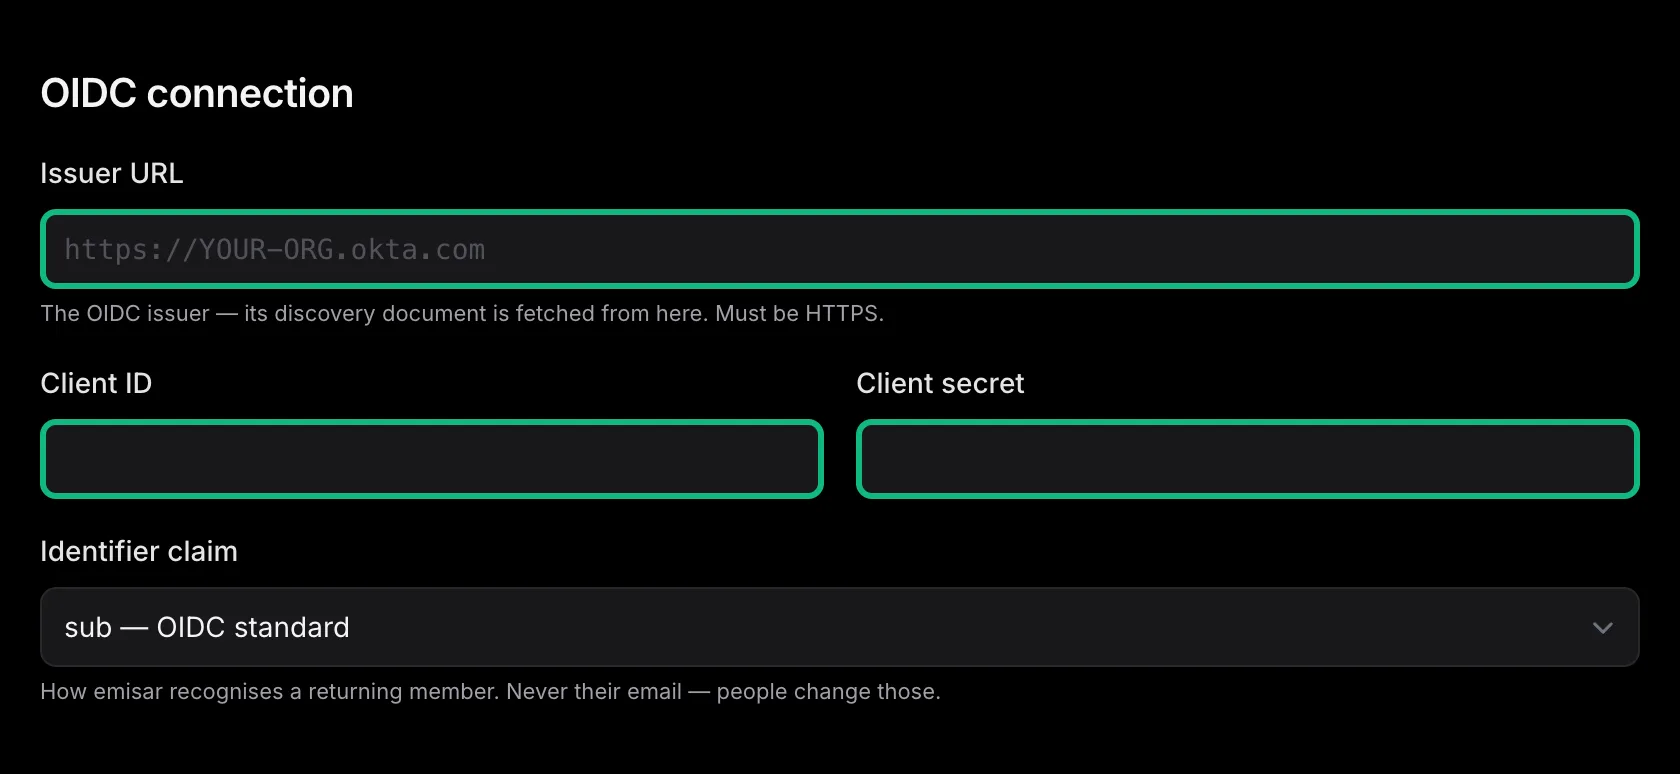
Back on the connection you opened in step 1, paste the client ID and secret. For the issuer use your org authorization server. Copy the org URL from the account menu in the Okta admin console (
https://your-org.okta.com, without-adminor an/oauth2/…path). Select Add connection, then Verify sign-in and complete the identity checks. After verification, select Enable for members and confirm.emisar · Add connectionThree values from Okta. The issuer is your org URL, not an authorization-server path.
This guide covers only the provider-specific fields. Single sign-on explains provisioning, default roles, runner access, and provider MFA settings.
A custom authorization server
lets an Okta
administrator rewrite the subject claim. Its tokens can use an email as
sub
instead of the Okta user
ID. The organization server keeps
sub
equal to the Okta user ID.
directory sync
uses the same value, so login and provisioning identify one person.
Directory sync#
You need the connection's SCIM base URL and bearer token — enabling directory sync shows where both come from. Only available on Enterprise.
- An Okta administrator.
- An emisar owner or admin.
- The connection's SCIM base URL and bearer token, from the steps above.
Okta does not allow SCIM provisioning on an OIDC integration. Use separate integrations for sign-in and provisioning. This is an Okta limit, not an emisar limit. The provisioning application's sign-on does not need to work. It only carries the SCIM configuration.
-
1
In Okta
Add the SCIM 2.0 Header Auth app.
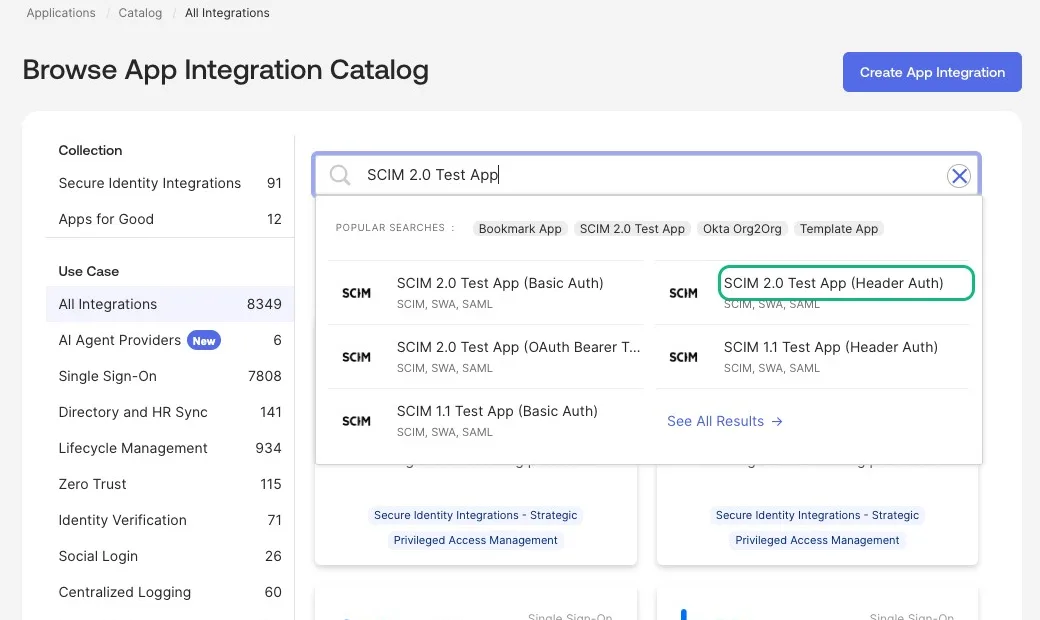
In the Okta Admin Console go to Applications → Applications → Browse App Catalog and search for SCIM 2.0. Pick SCIM 2.0 Test App (Header Auth) — Header Auth is the variant that sends the token the way emisar reads it — then Add Integration. Name it something an administrator will recognise later, take the defaults on the Sign-On tab, and finish.
Okta Admin Console · Browse App Integration CatalogFour SCIM test apps share this name — take the 2.0 Header Auth one. -
2
In Okta
Point it at emisar and test the credentials.
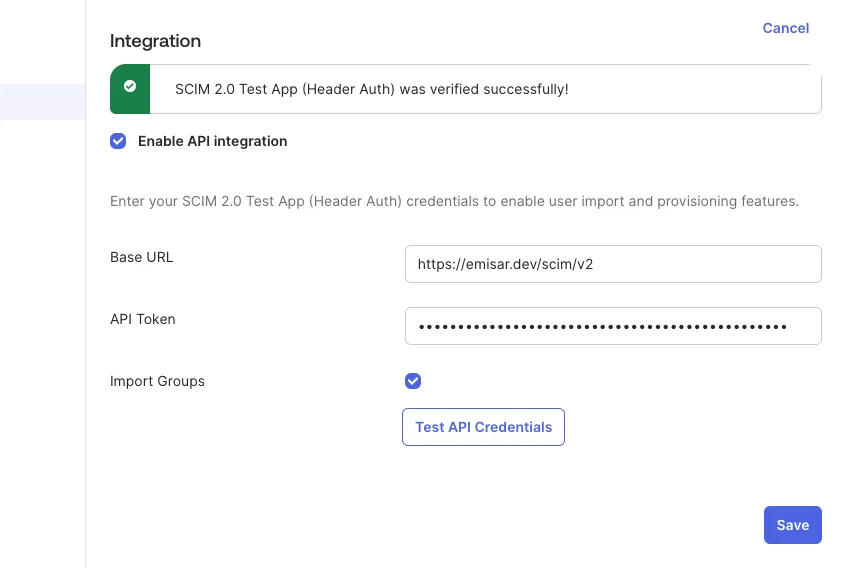
On the application's Provisioning tab, choose Configure API Integration and enable API integration. Enter the SCIM base URL as Base URL. Enter the bearer as API Token. Paste the token exactly as emisar showed it. Okta sends it in the
Authorizationheader without aBearerkeyword. Theems-prefix lets emisar accept it unambiguously. Select Test API Credentials before saving.Okta Admin Console · Test API CredentialsThe green result confirms that Okta reached emisar with this URL and bearer. A failed test means the token or URL is wrong. Check for a truncated token and a base URL missing its
/scim/v2suffix. For a bad token, emisar returns “The SCIM bearer token is missing, malformed, or not authorized.” Okta shows this message. Rotate the token in emisar and paste the new one. -
3
In Okta
Turn on the lifecycle operations.
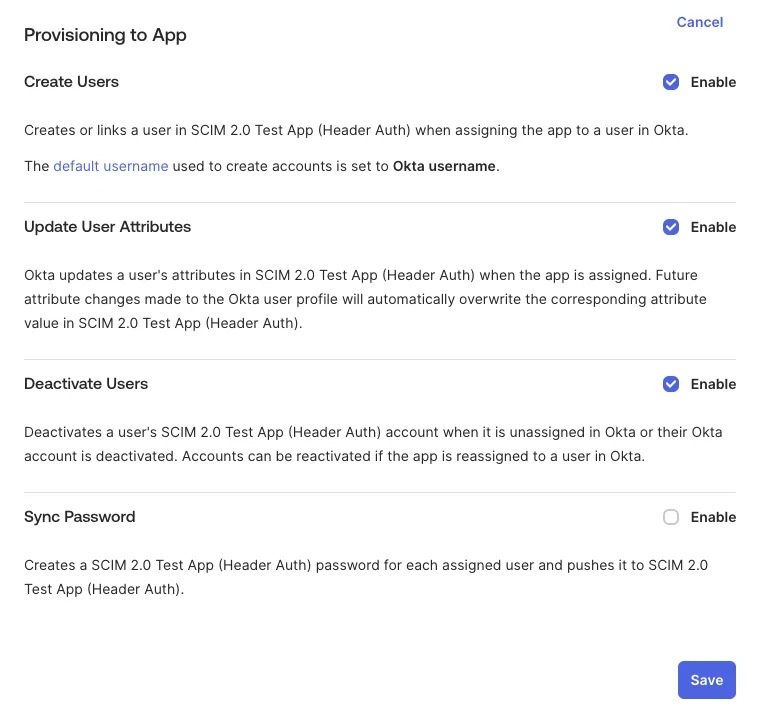
Still under Provisioning, open To App → Edit and set each operation as follows:
- Create Users
- On. Assigned people can be provisioned.
- Update User Attributes
- On. Profile changes reach Emisar.
- Deactivate Users
- On. This makes offboarding automatic and also carries reactivation.
- Sync Password
- Off. Emisar has no passwords to sync.
Okta Admin Console · Provisioning to AppWithout these three, the integration authenticates but never pushes anything. -
4
In Okta
Assign the people to sync.
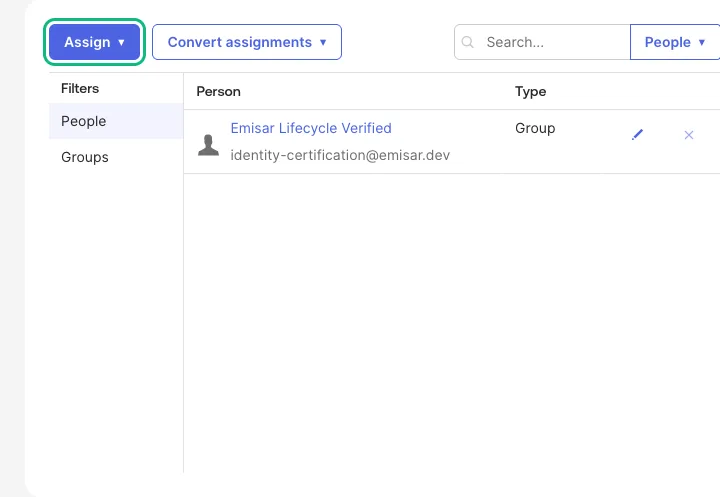
Assignment is what actually provisions someone. On the Assignments tab, use Assign → Assign to People (or to a group). Each person you assign appears in emisar under Members at the connection's default role, and each one you unassign is deprovisioned there.
Okta · AssignmentsThis live assignment provisioned the certification user through the assigned Okta group. -
5
In Okta
Push the groups you want to map access from.
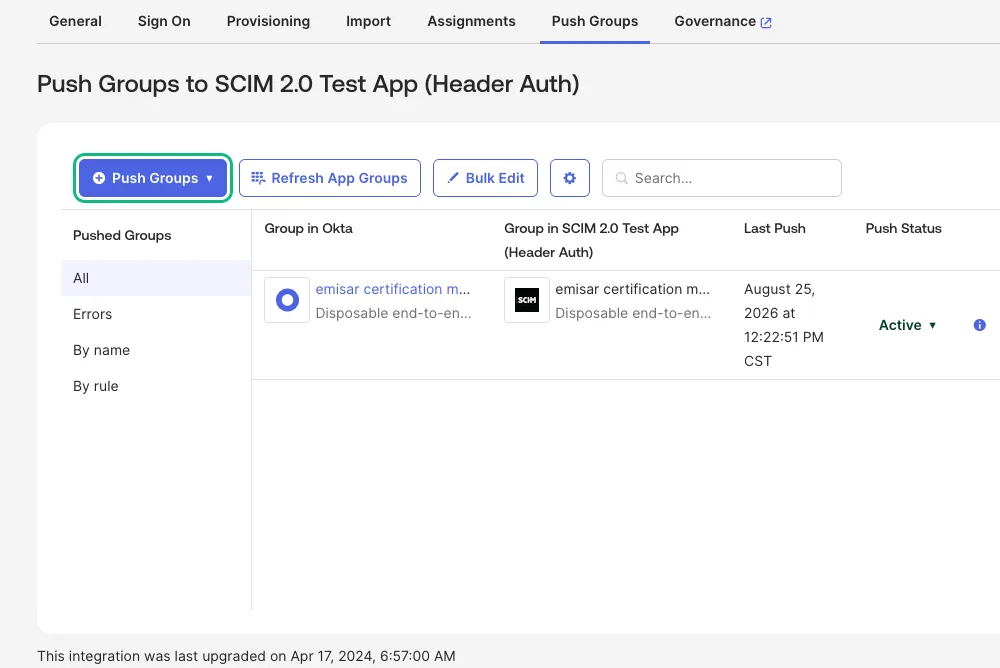
Complete this step when Okta groups control roles or runner access. Groups travel on their own tab — Push Groups, beside Assignments, not part of the To App settings you just turned on. Push a group here and it appears in emisar under Groups & access, ready to map by its immutable directory-group identity.
Okta · Push GroupsThis group was pushed successfully and is Active. Assigning people does not push their groups.
Okta sends the user ID as SCIM externalId. ID tokens from the
organization authorization server use the same value as sub. Sign-in and directory sync
therefore identify one emisar member. Two
things break that: a custom
authorization server, whose subject claim an admin can rewrite, and access tokens, whose
sub
is often an email. Use the org authorization server, and check one real user before you
roll out.
Next: configure Role mapping or runner access for the synced groups that need them.